Making a Transaction
This page explains the steps to make a transaction on the Jova POS desktop application, from creating a new transaction, adding products, to completing payment.
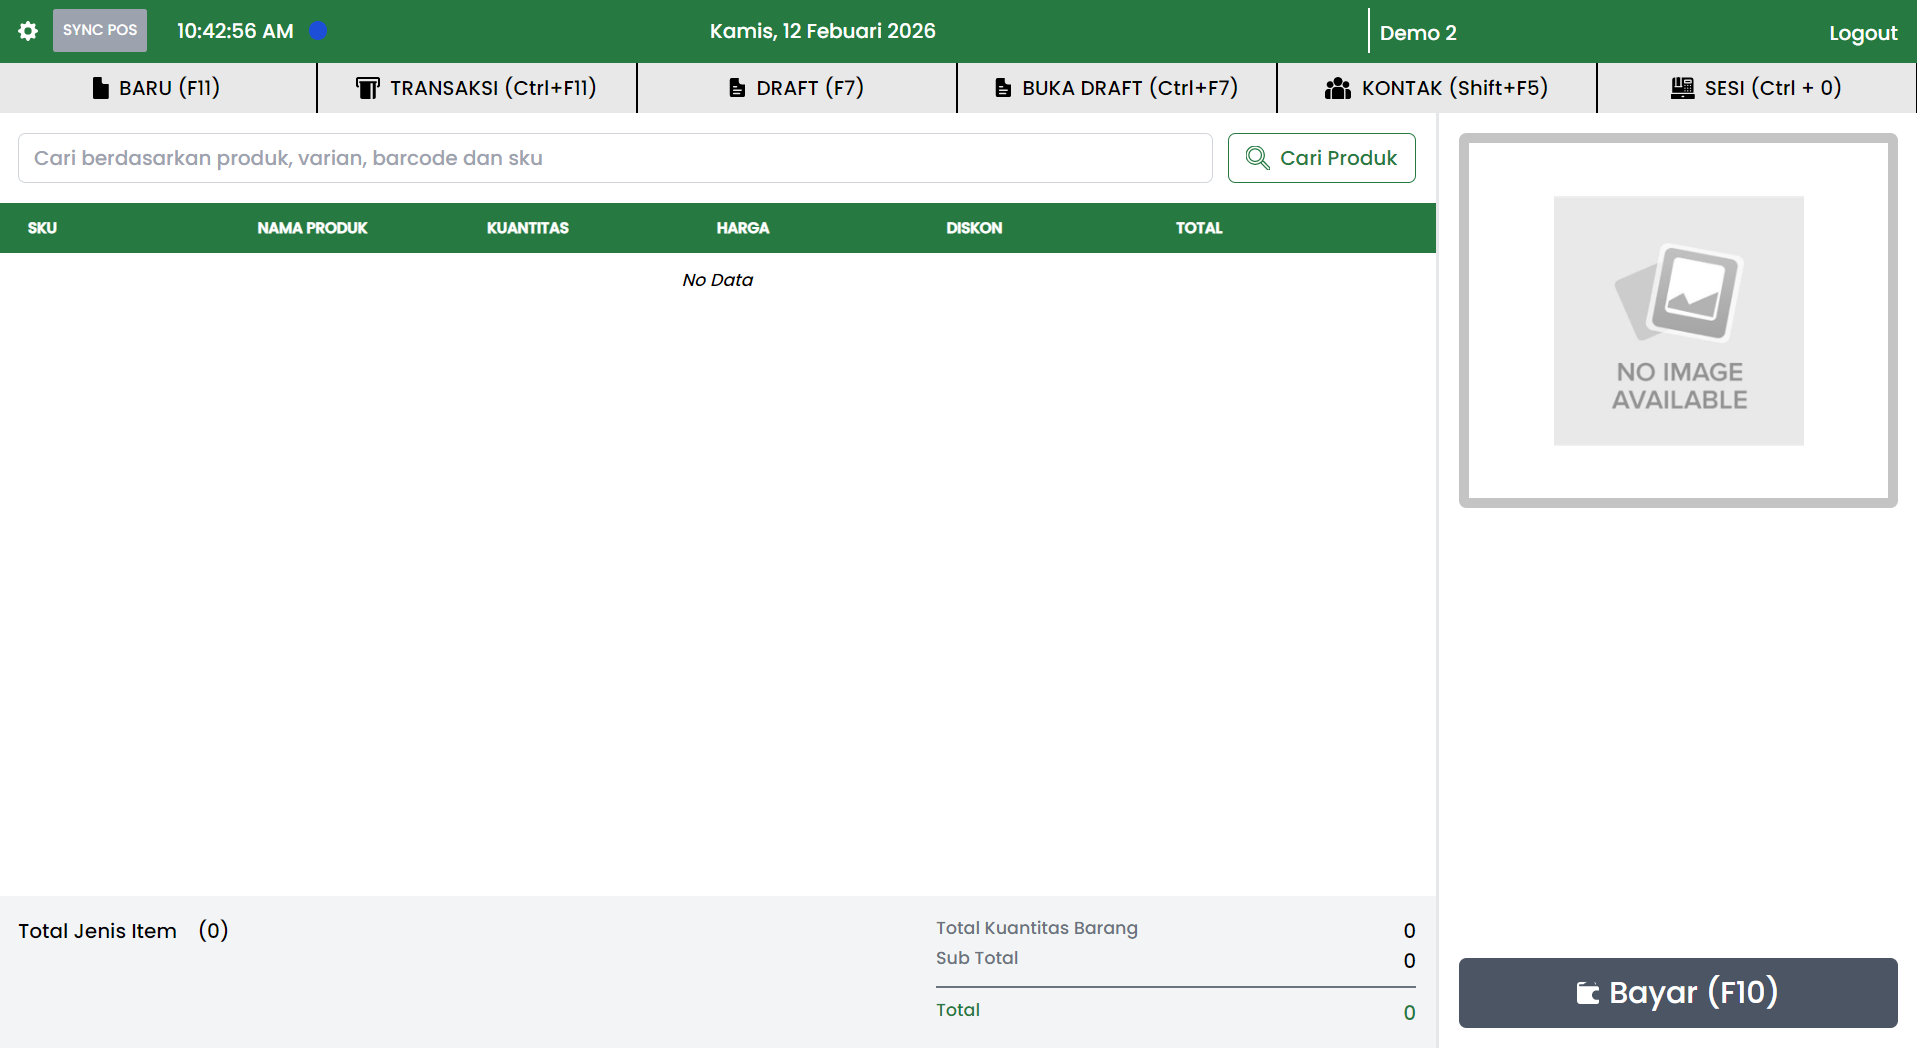
1. Starting a New Transaction
Before entering products, make sure you are on the POS Desktop page.
At the top, quick menu items are available:
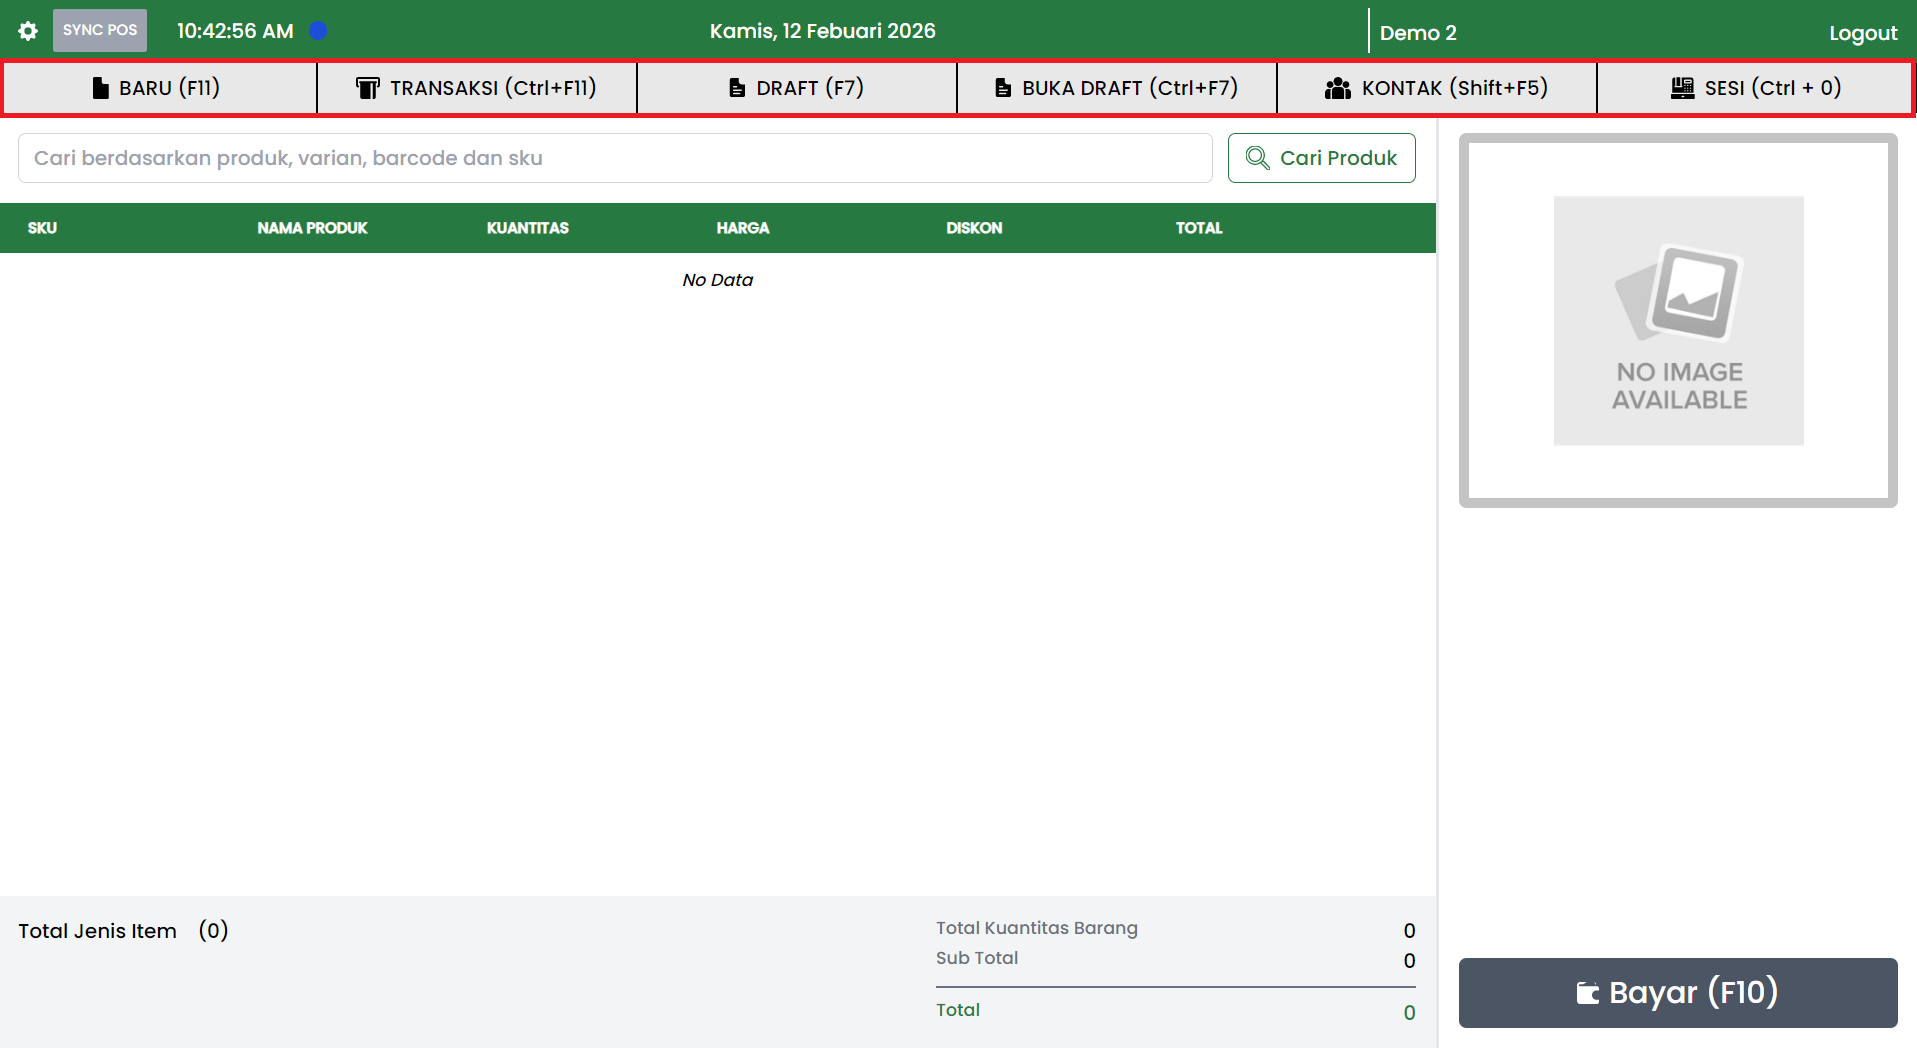
Available menu items:
- NEW (F11): Creates a new transaction and clears the cart.
- TRANSACTIONS (Ctrl+F11): Opens transaction list or history.
- DRAFT (F7): Saves the ongoing transaction as a draft.
- OPEN DRAFT (Ctrl+F7): Opens previously saved draft transactions.
- CONTACTS (Shift+F5): Opens customer contact data.
- SESSION (Ctrl + 0): Views and manages cashier sessions.
To start a new transaction from scratch, press NEW (F11).
2. Searching and Adding Products
To add a product to the transaction:
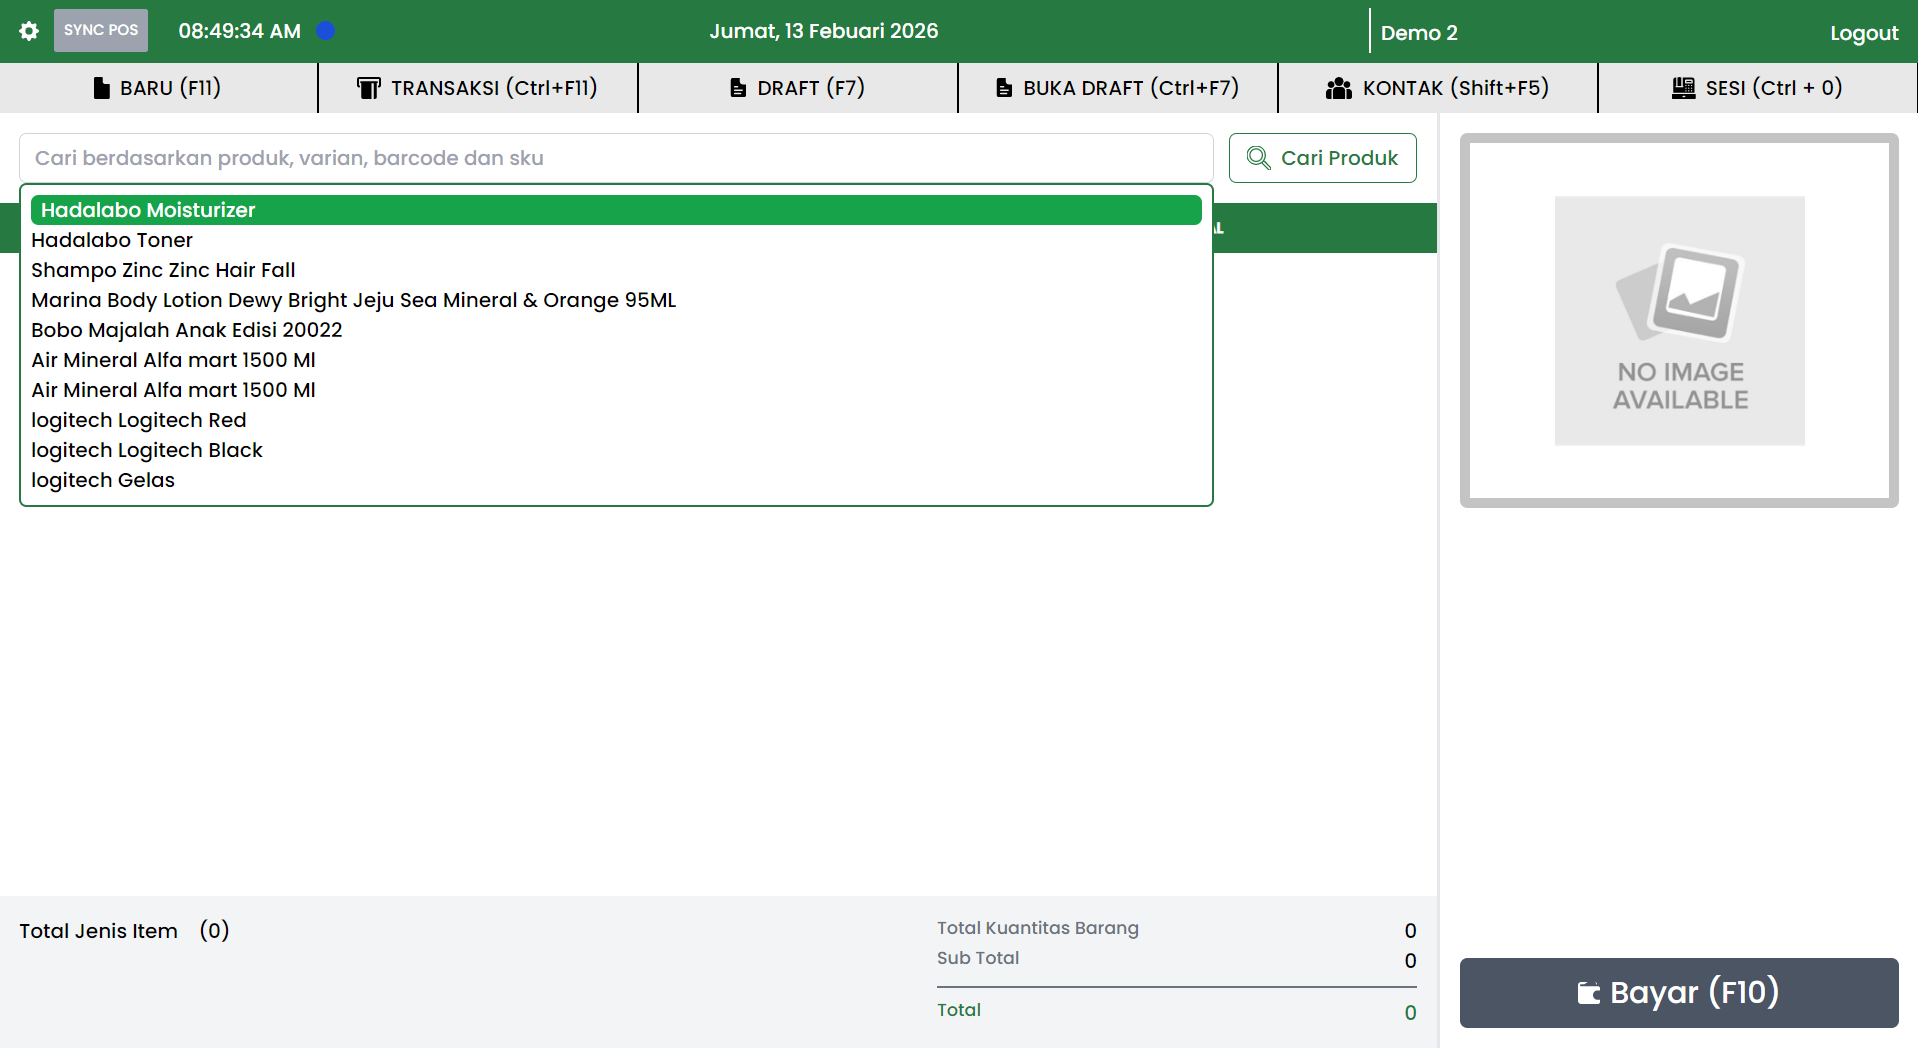
- Click the search field with the prompt: Search by product, variant, barcode, and sku
- Type the product name, variant, barcode, or SKU.
- Click the product that appears in the search results.
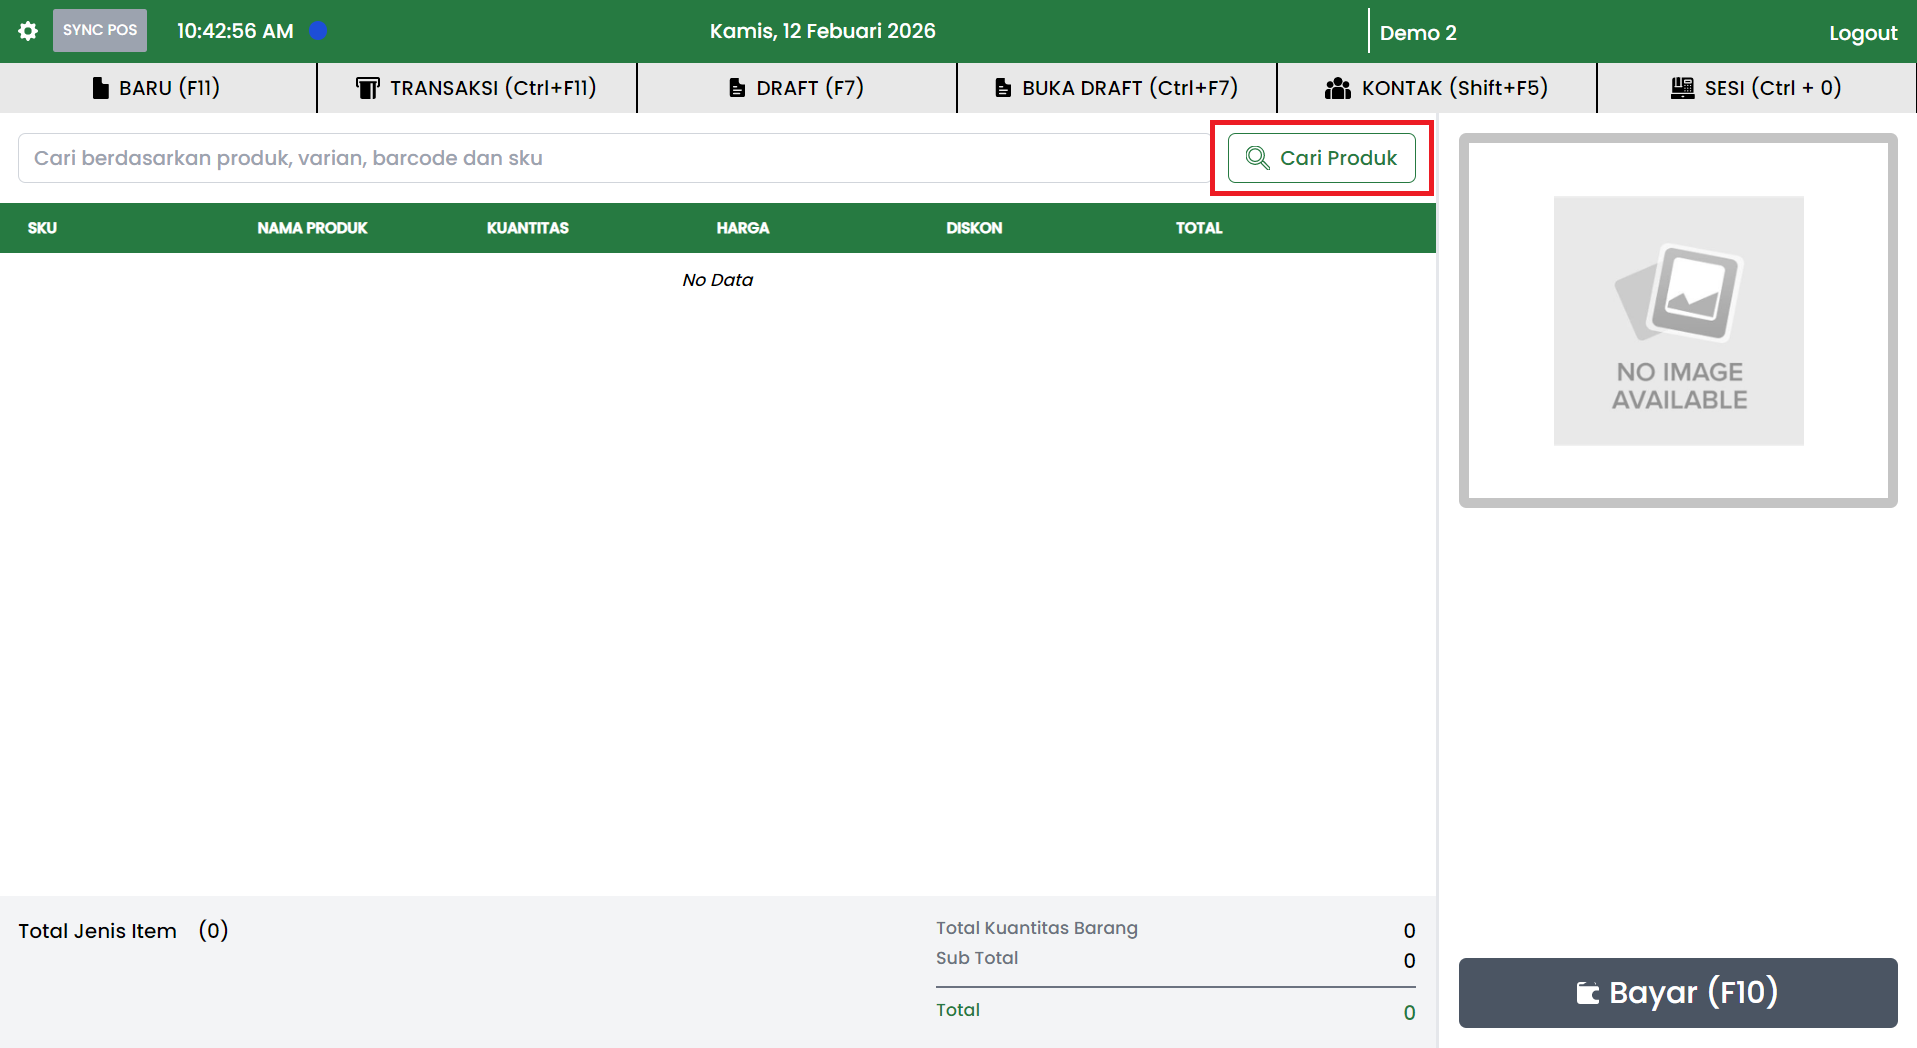
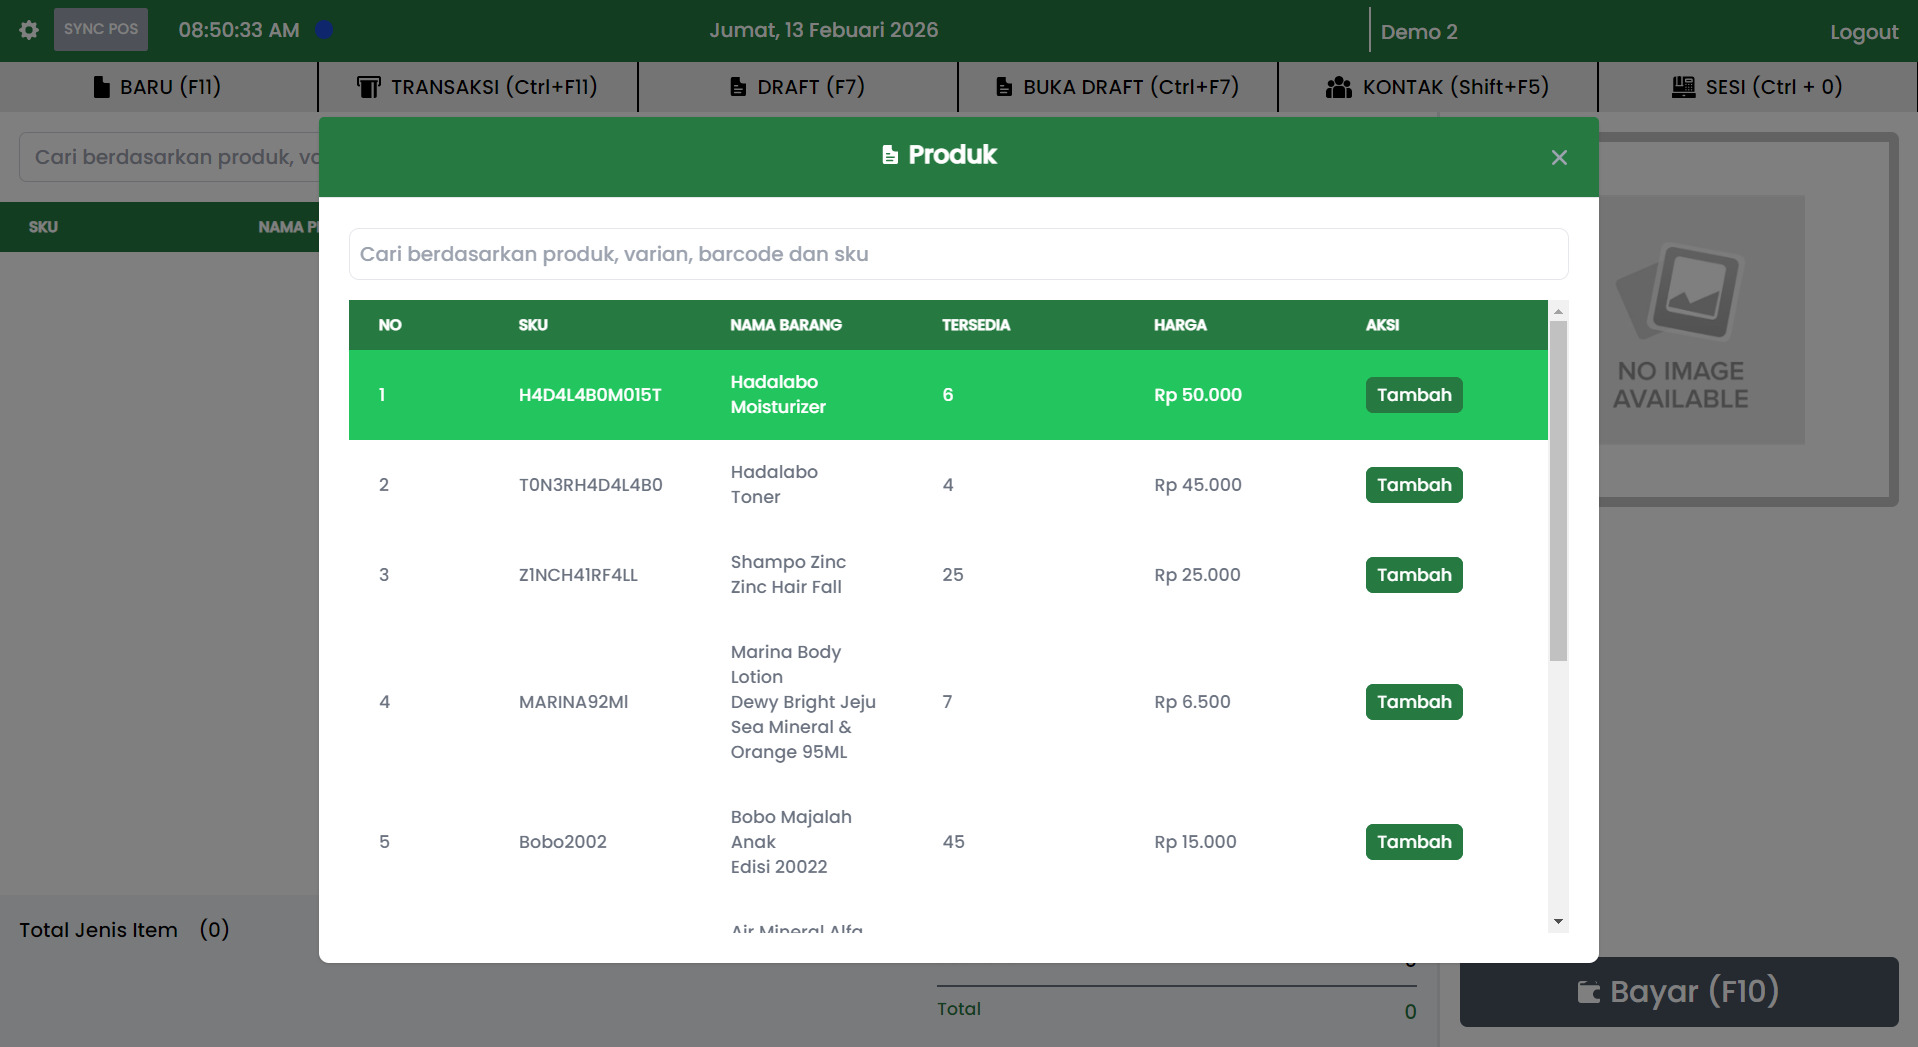
The selected product will enter the item table (cart).
3. Checking the Item Table (Cart)
Selected products will appear in the transaction table.
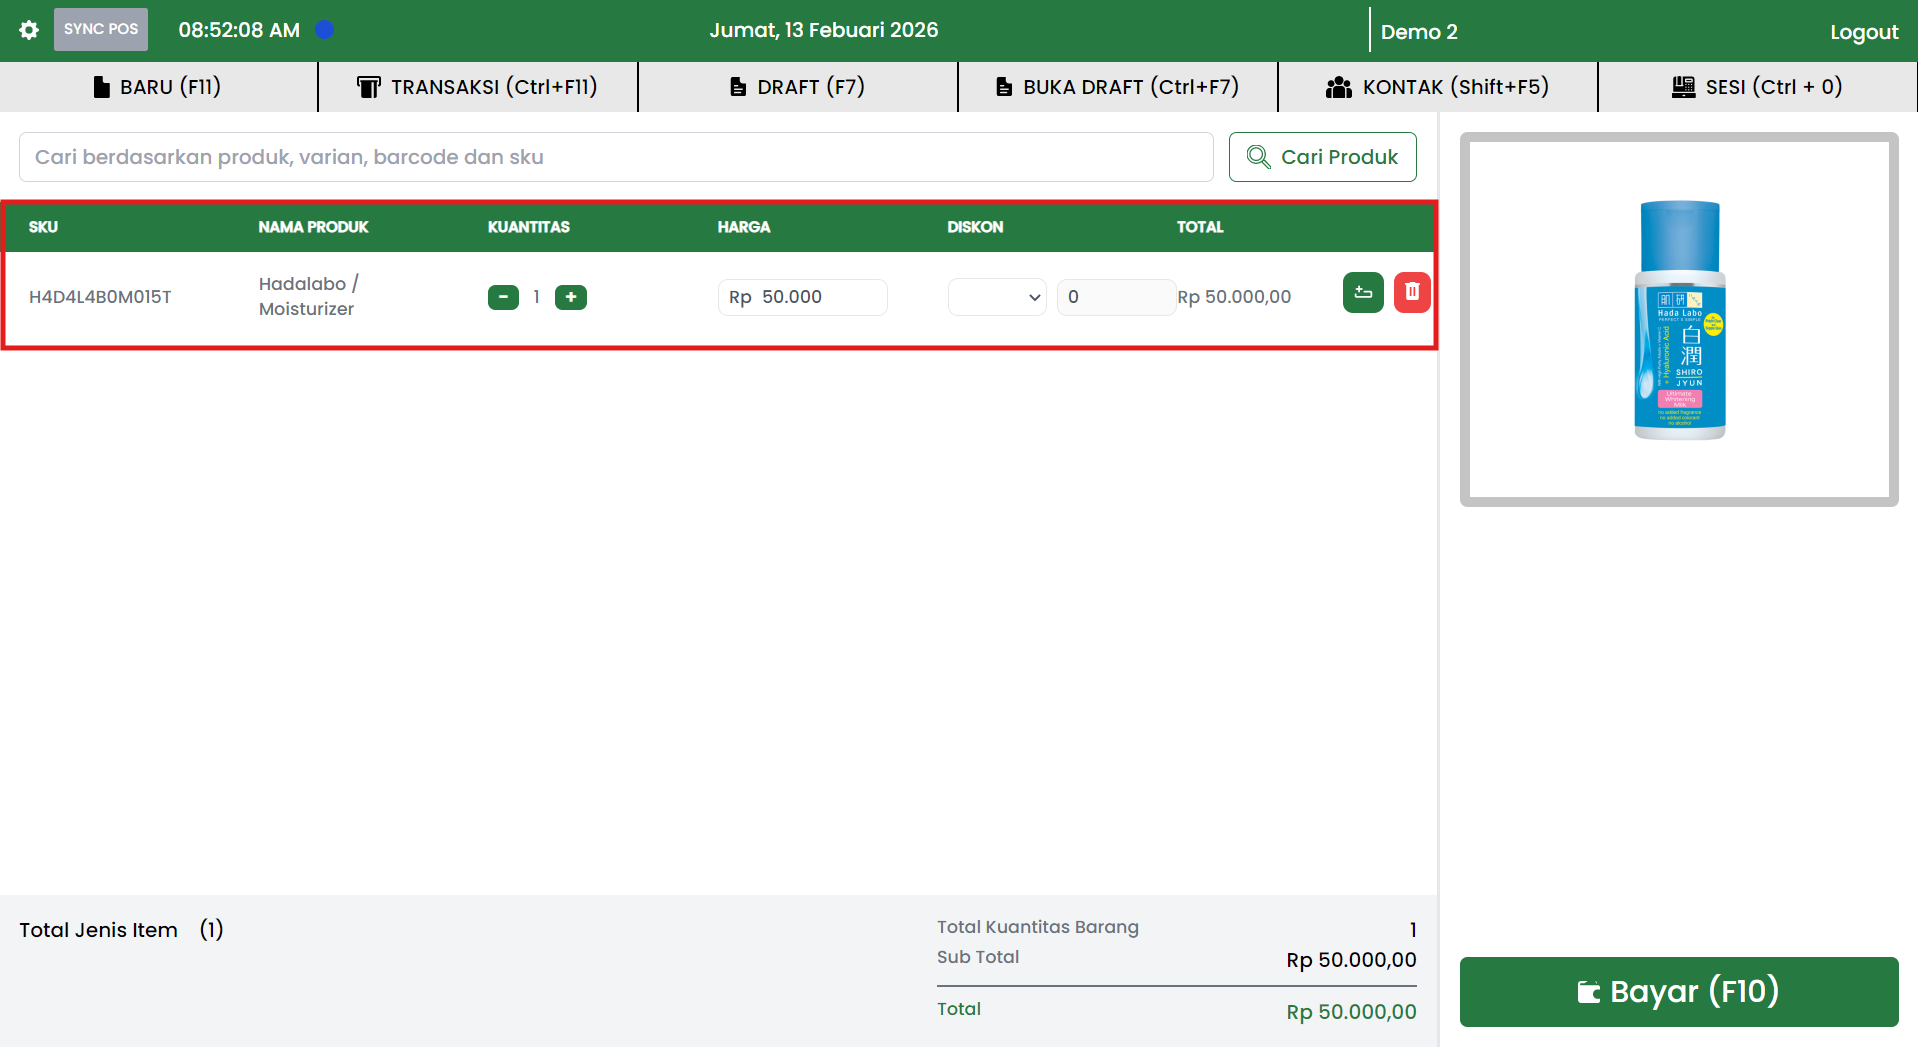
Available columns:
- SKU
- PRODUCT NAME
- QUANTITY
- PRICE
- DISCOUNT
- TOTAL
Make sure:
- The quantity is correct.
- The price is correct.
- The discount is correct (if any).
- There are no wrong or duplicate items.
If there are no items, the system displays No Data.
4. Viewing Product Preview
On the right side, there is a product preview panel.
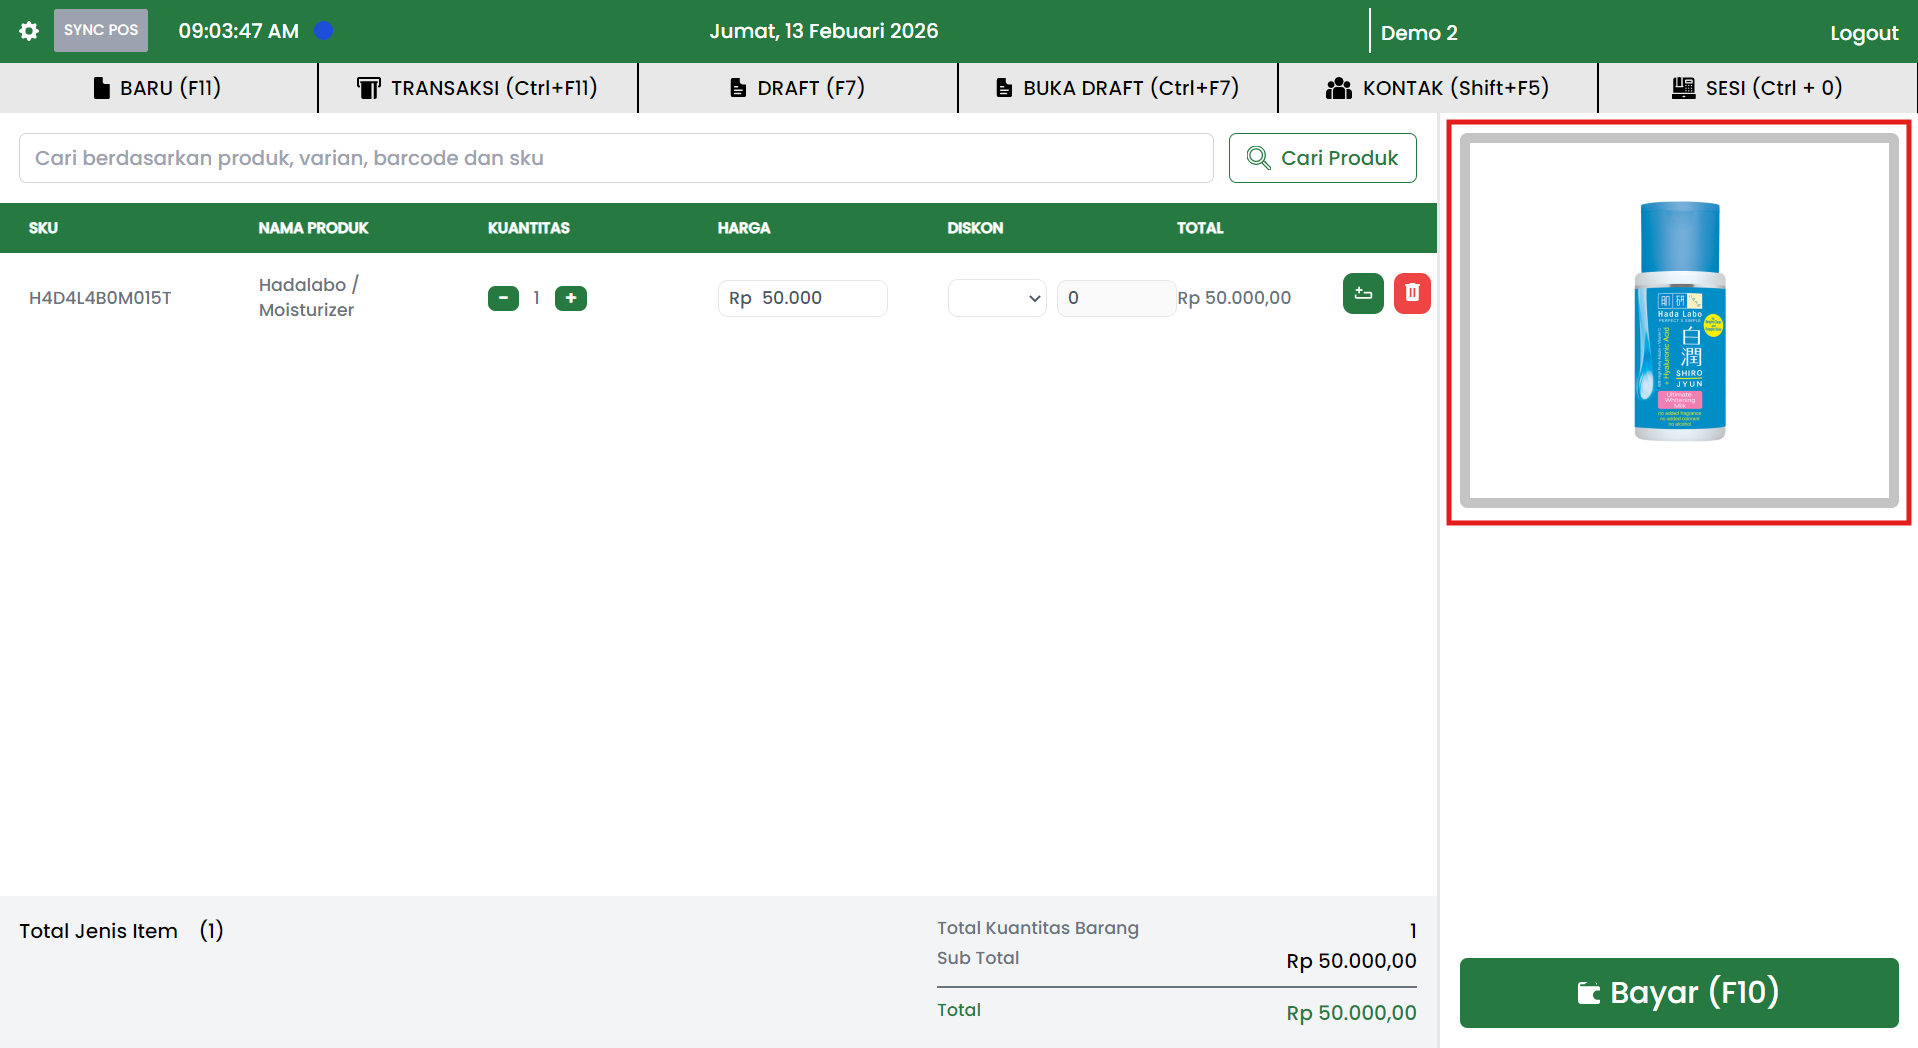
Functions:
- Displays the photo of the selected product.
- If the product has no photo, No Image Available will be shown.
5. Checking Transaction Summary
Before making payment, check the transaction summary at the bottom of the screen.
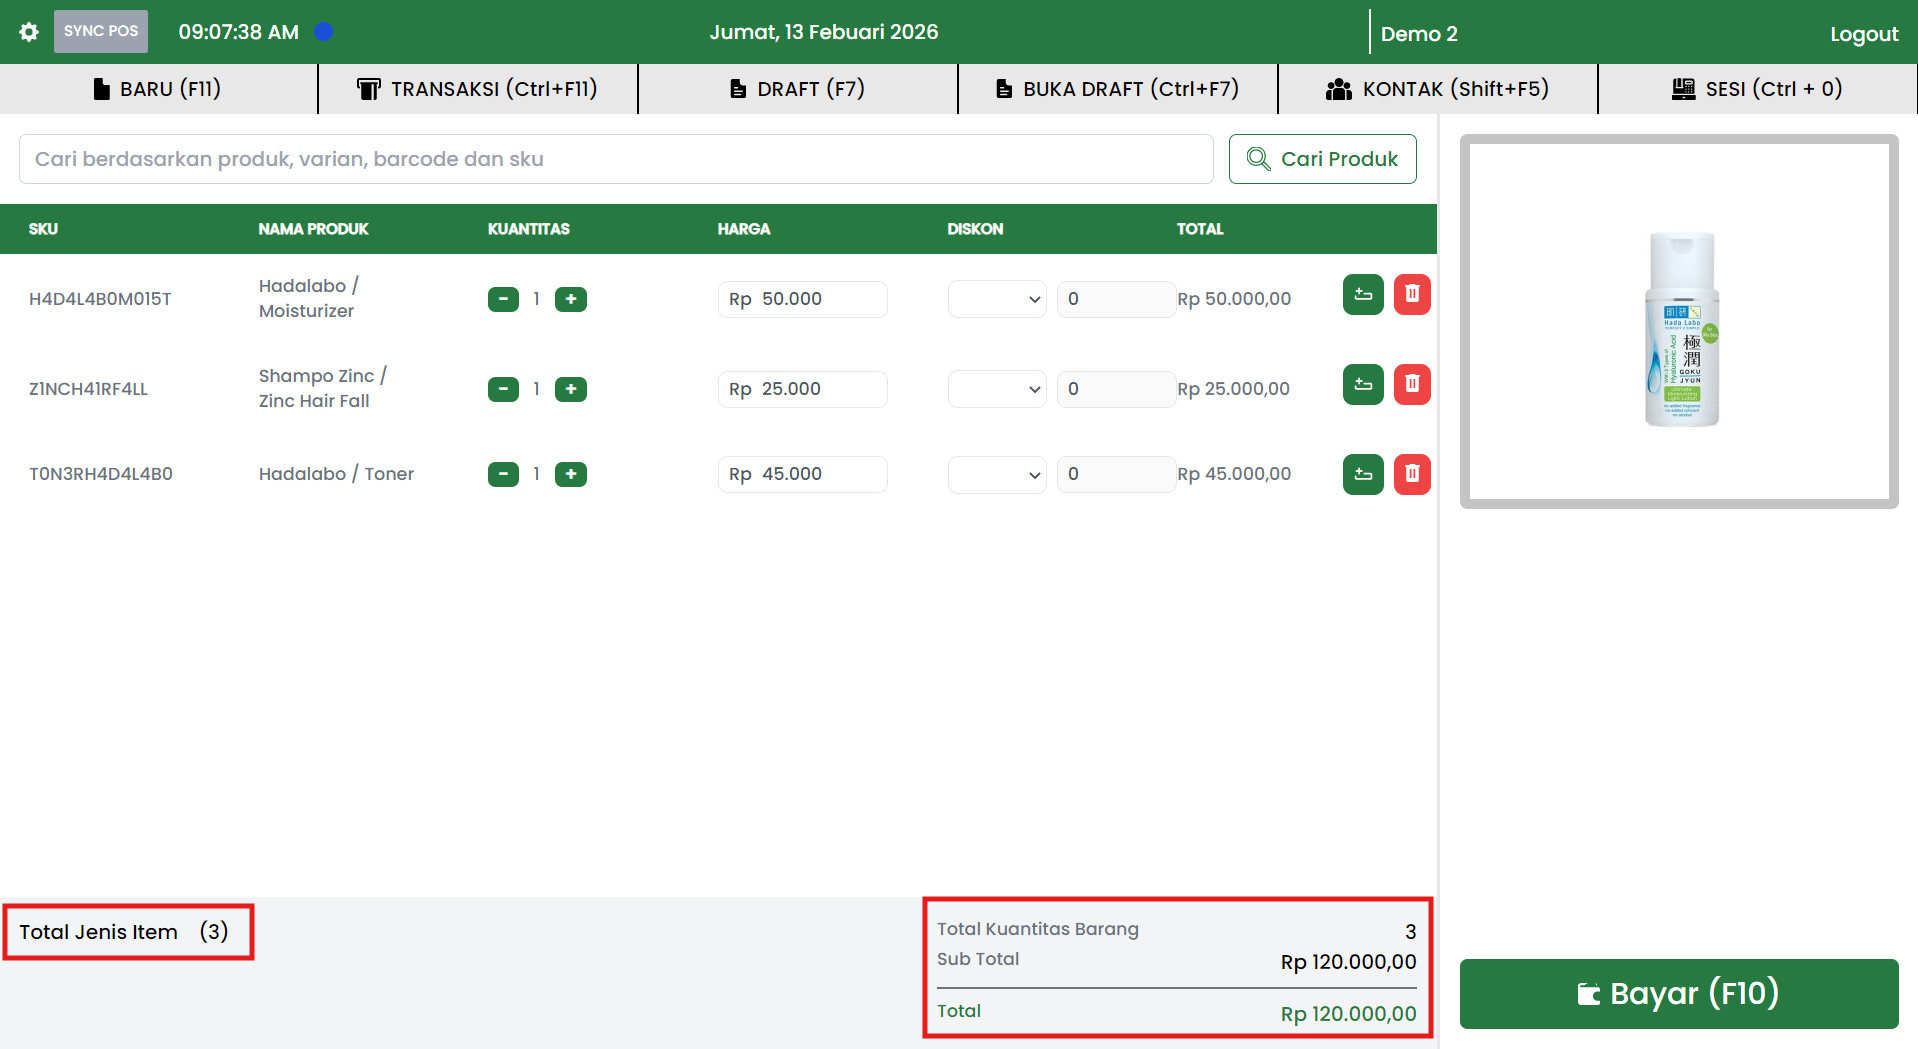
Summary displayed:
- Total Item Types
- Total Item Quantity
- Sub Total
- Total
Make sure the total is correct before proceeding to payment.
6. Making Payment
After all items are entered and the total is correct, click the button:
Pay (F10)
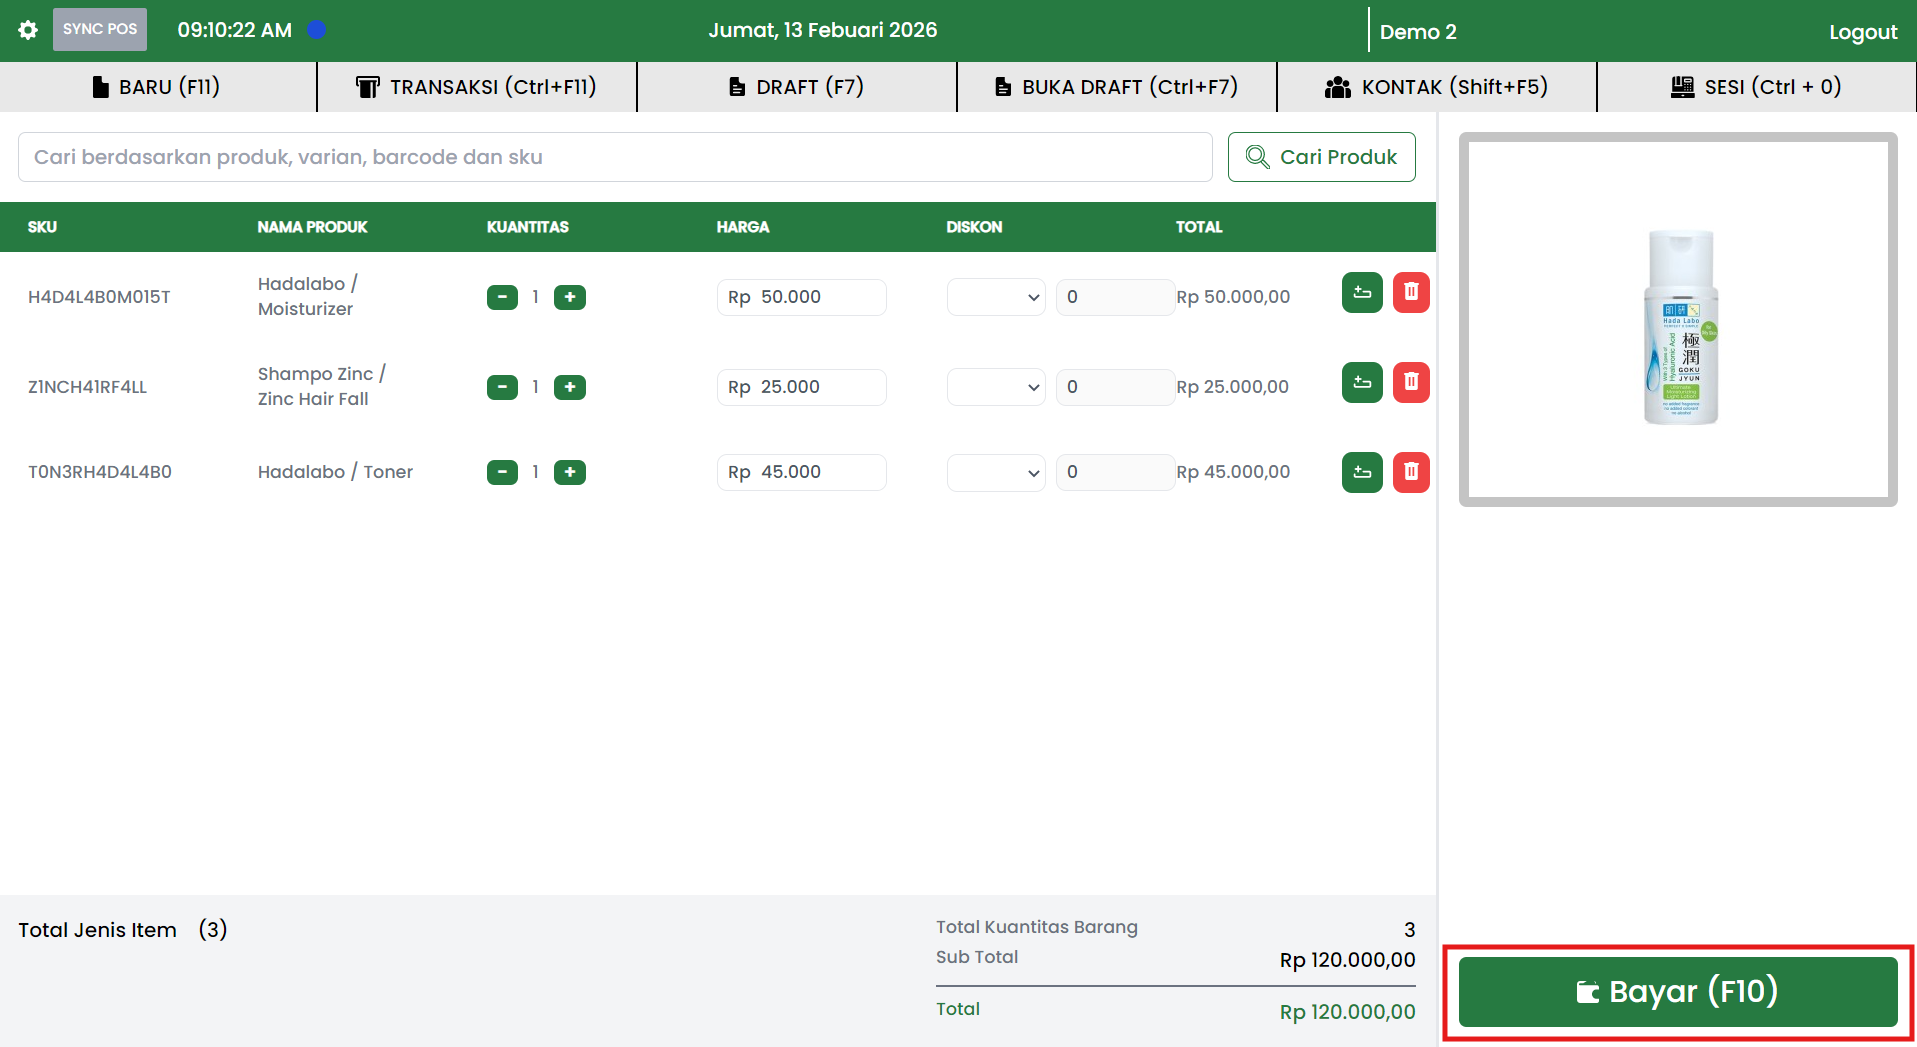
This button is located at the bottom right of the screen and is used to open the payment popup.
Things to Ensure Before Pressing Pay
Make sure:
- All products are entered into the transaction table.
- The quantity is correct.
- The discount is correct.
- The Sub Total and final Total are correct.
- The customer has agreed to the total purchase.
To speed up transactions without a mouse, press:
F10
7. Filling in the Payment Popup
After the Pay (F10) button is pressed, the system will display the payment popup.
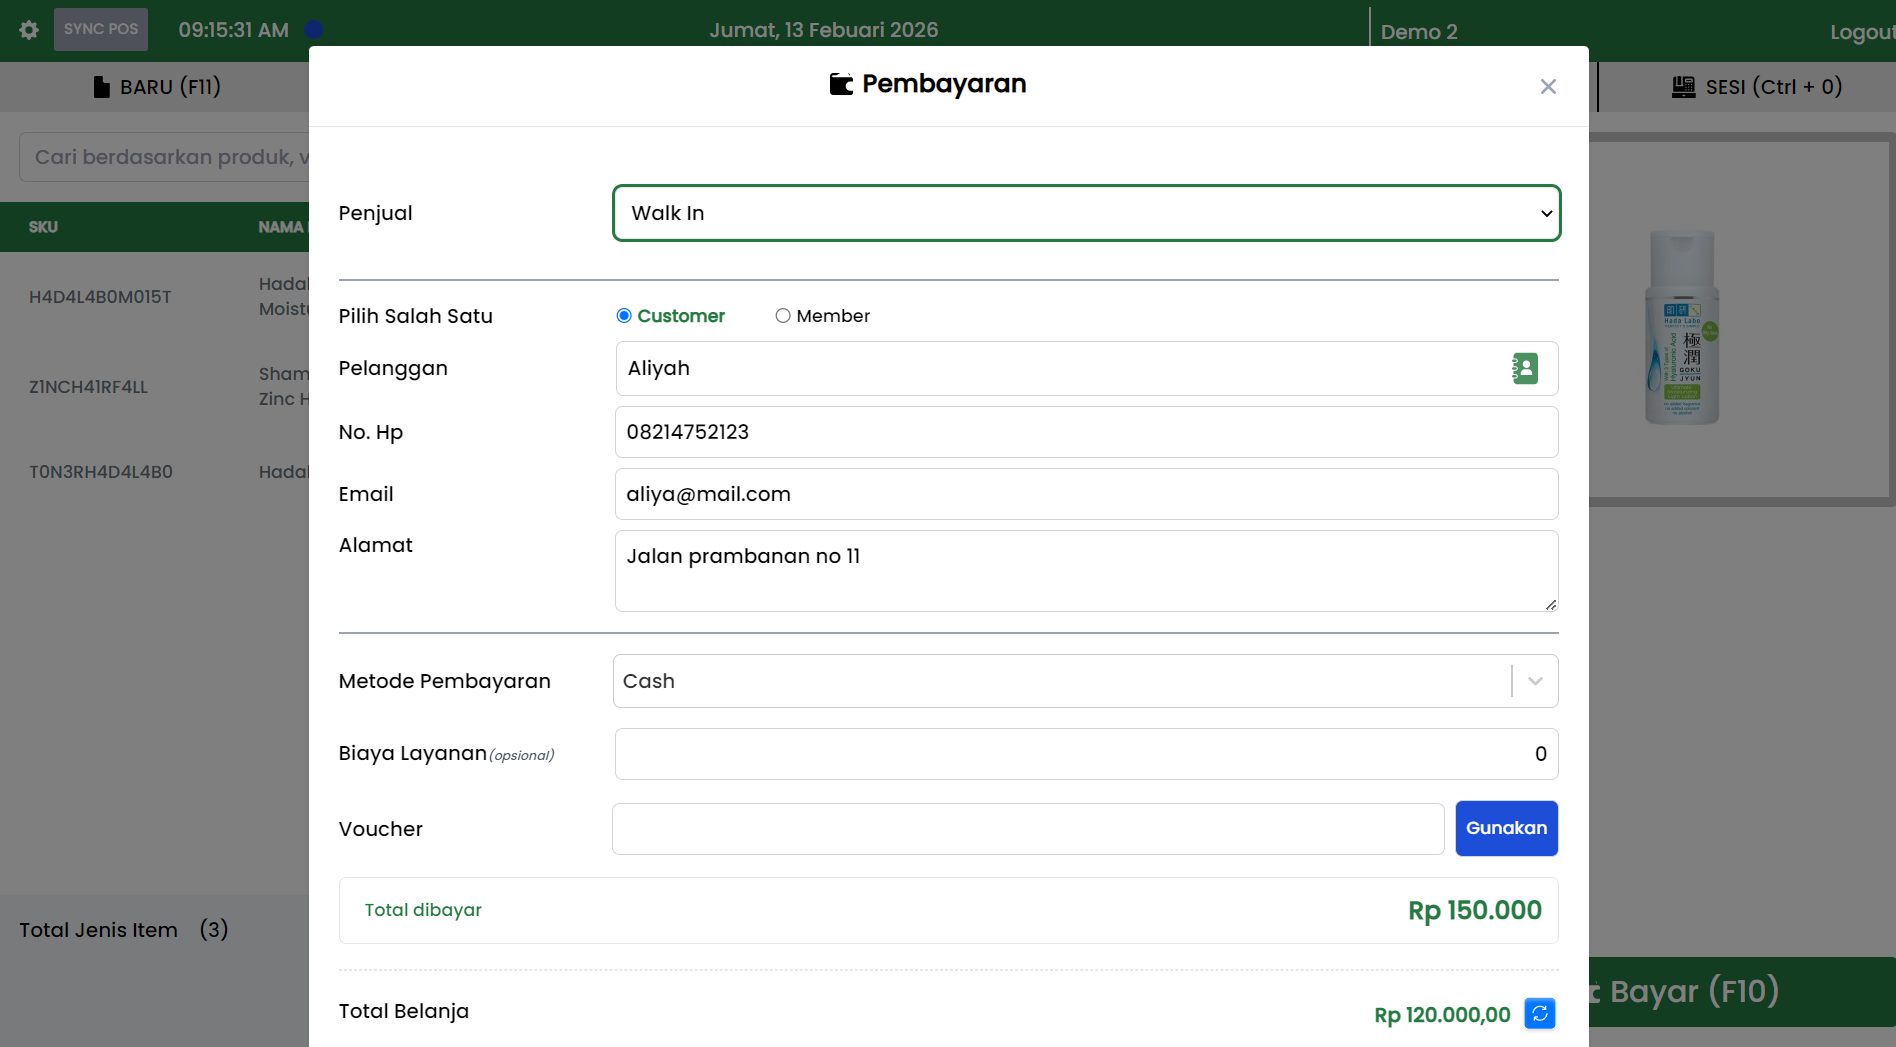
7.1 Seller
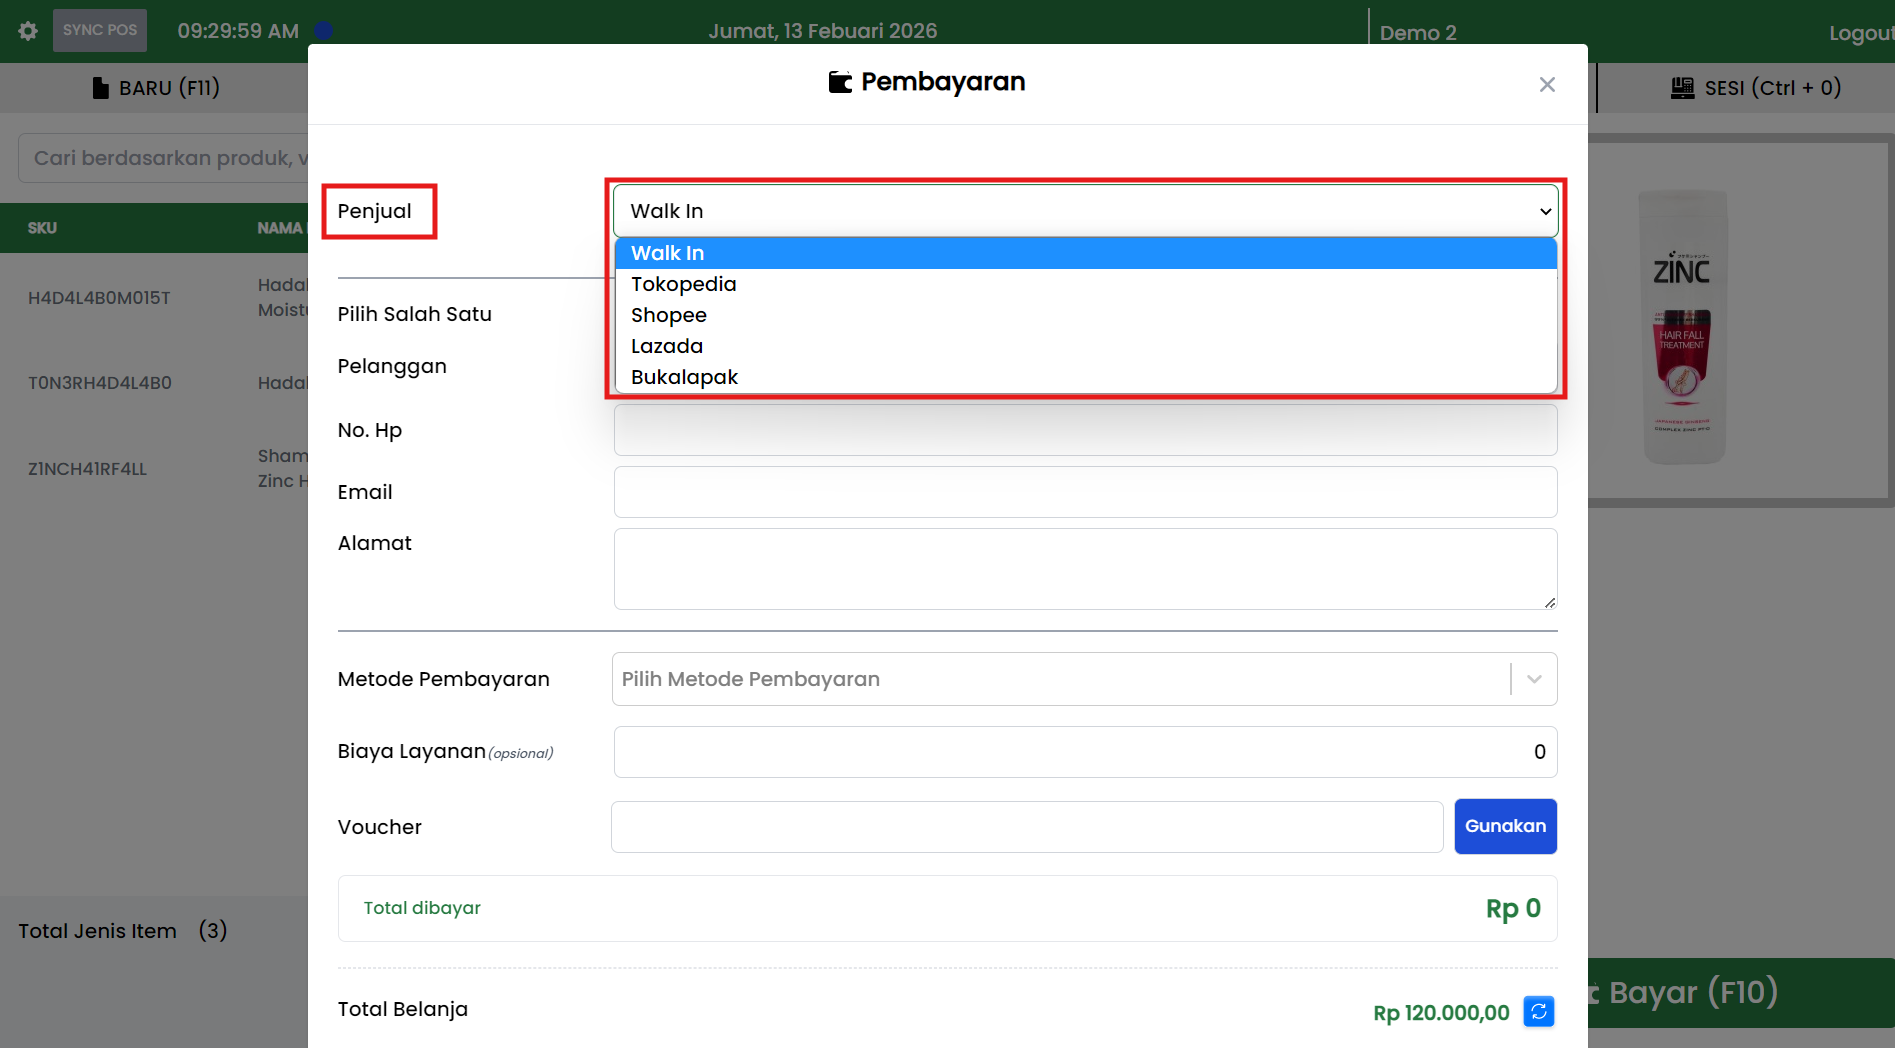
Shows who is performing the transaction.
Usually auto-filled with Walk In or the cashier's name.
7.2 Customer Type
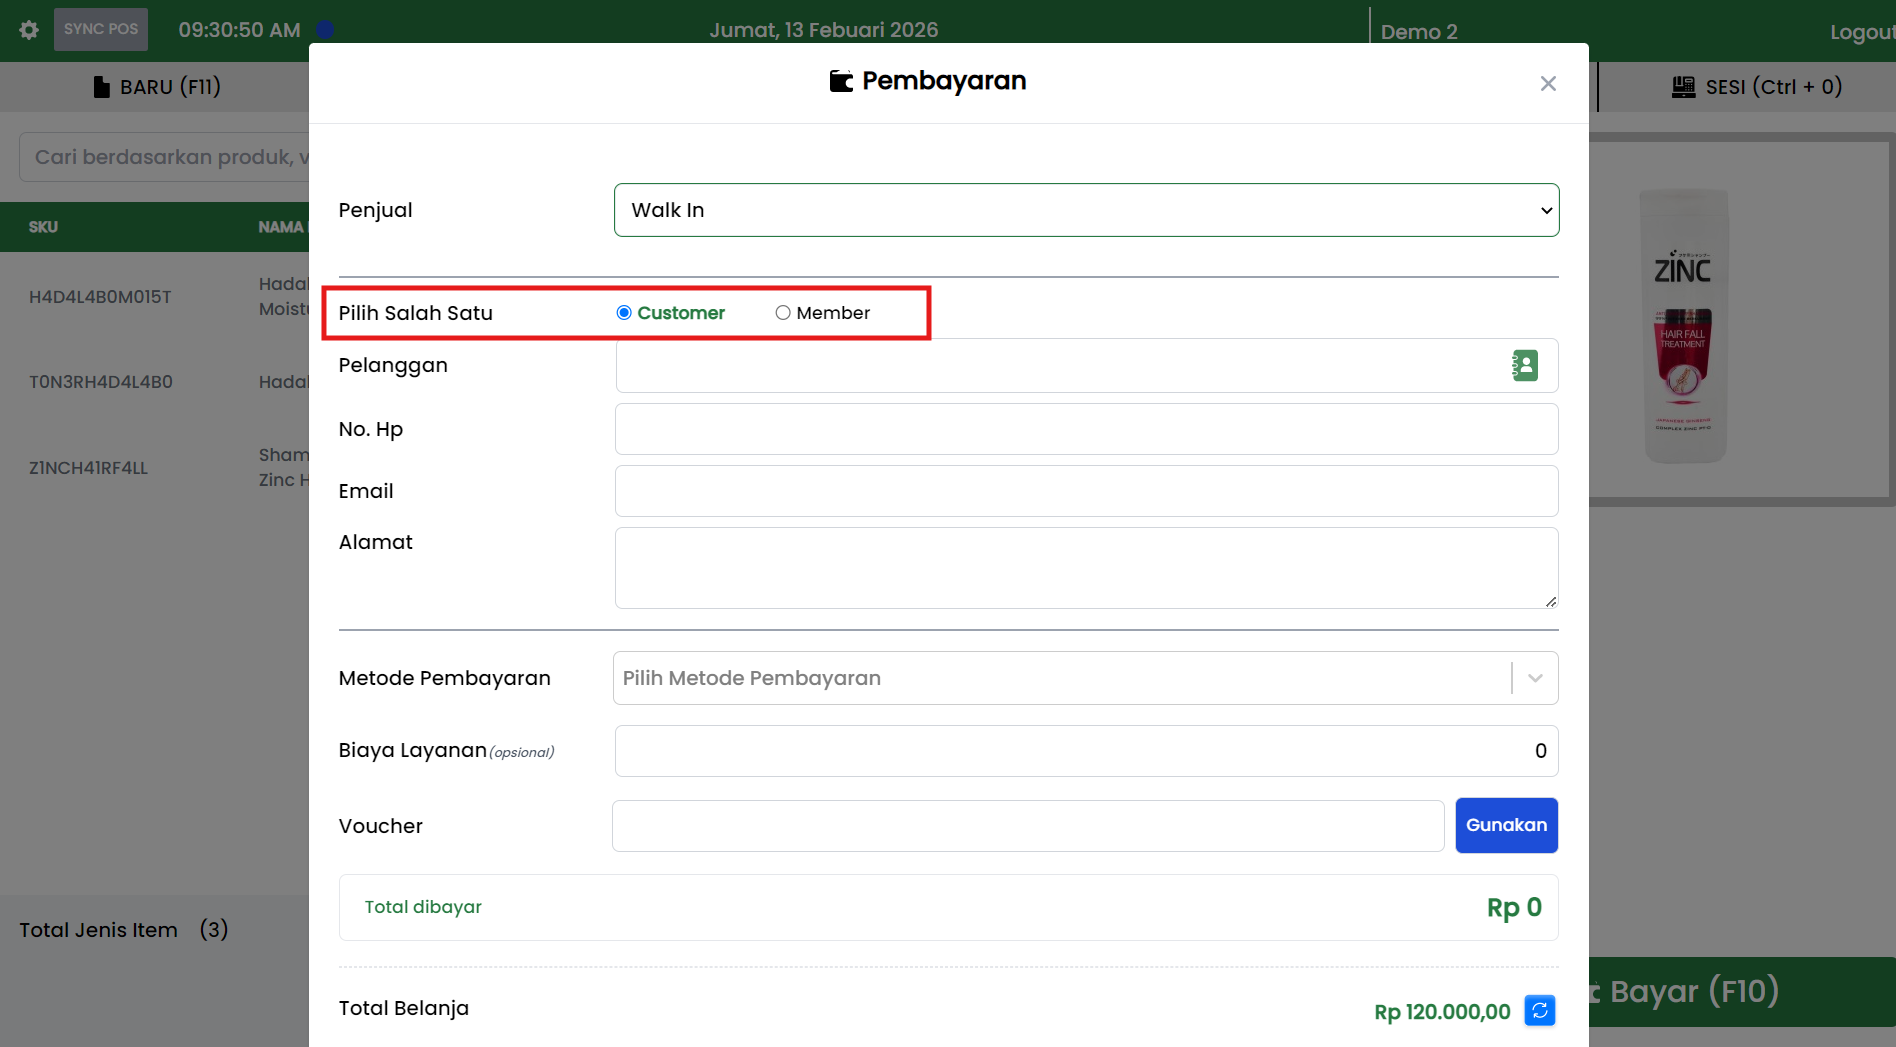
Select:
- Customer
- Member
If Member is selected, the system will pull stored member data.
7.3 Customer Data
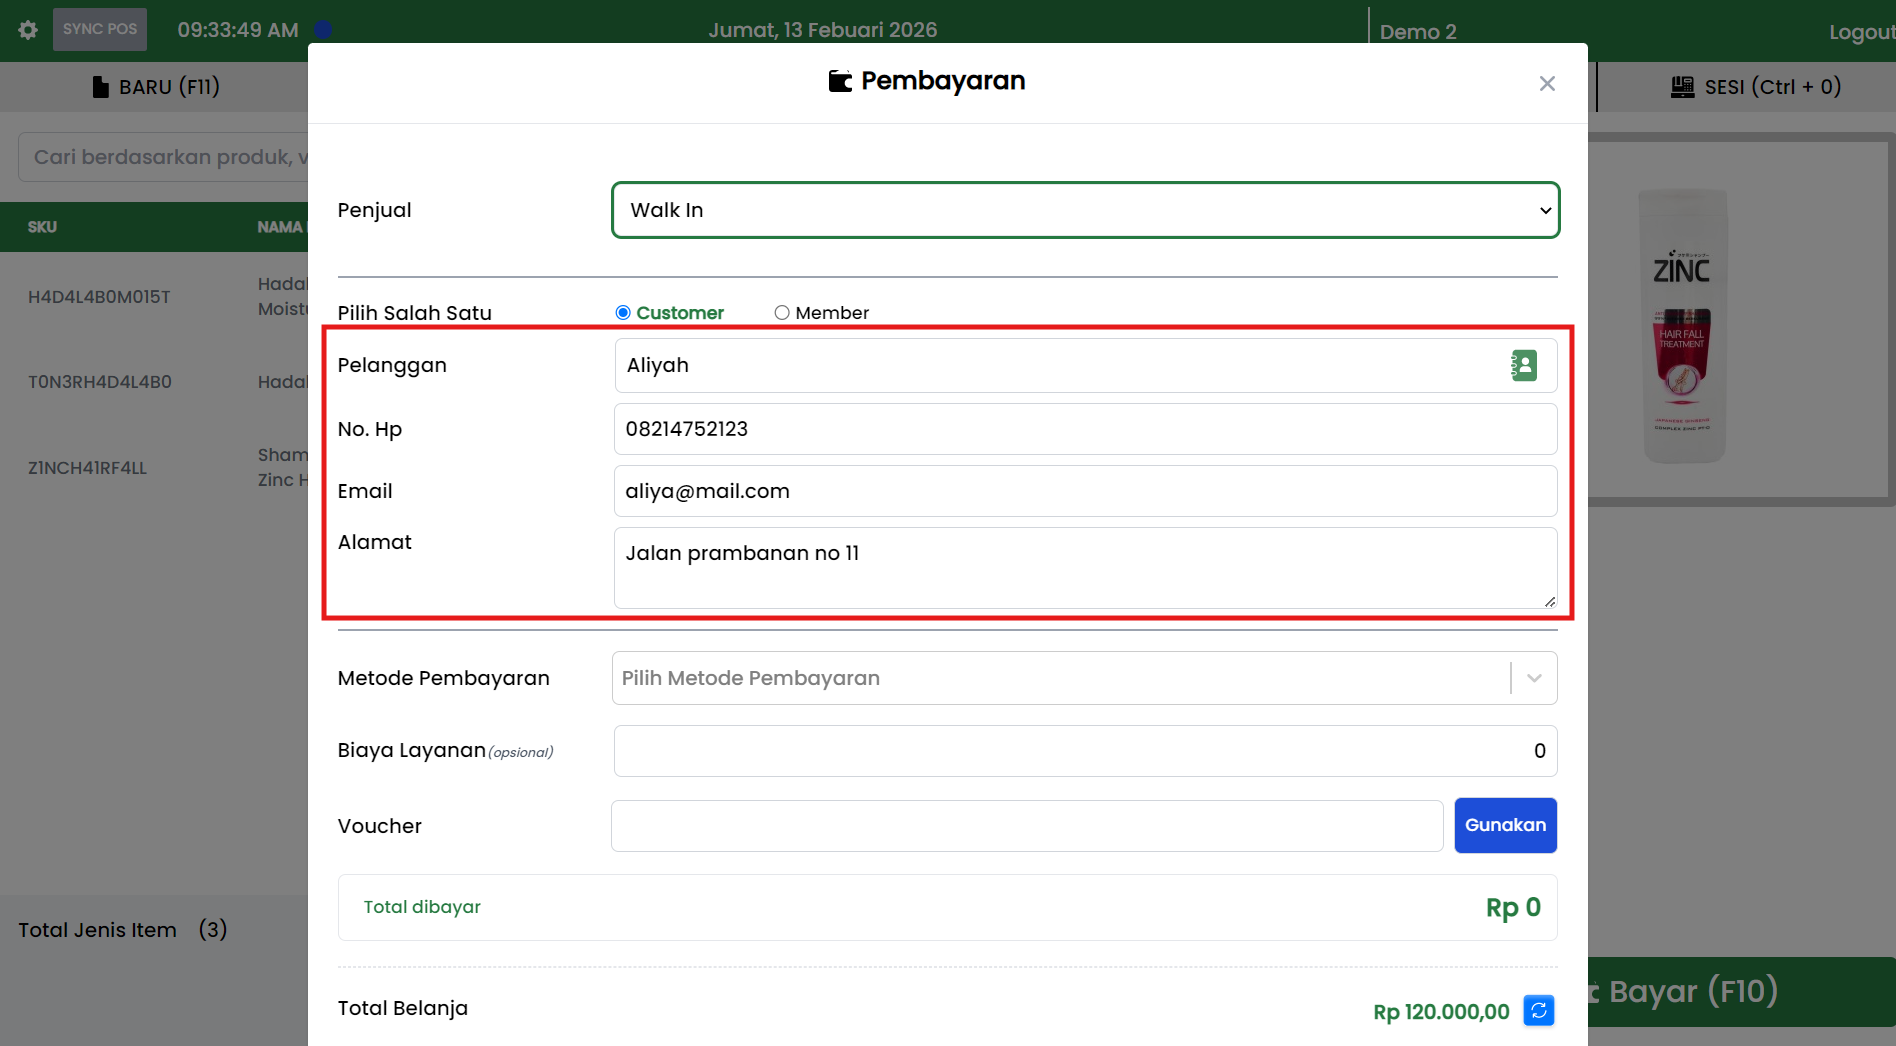
Fill in or confirm the following data:
- Customer Name
- Phone
- Address
7.4 Payment Method
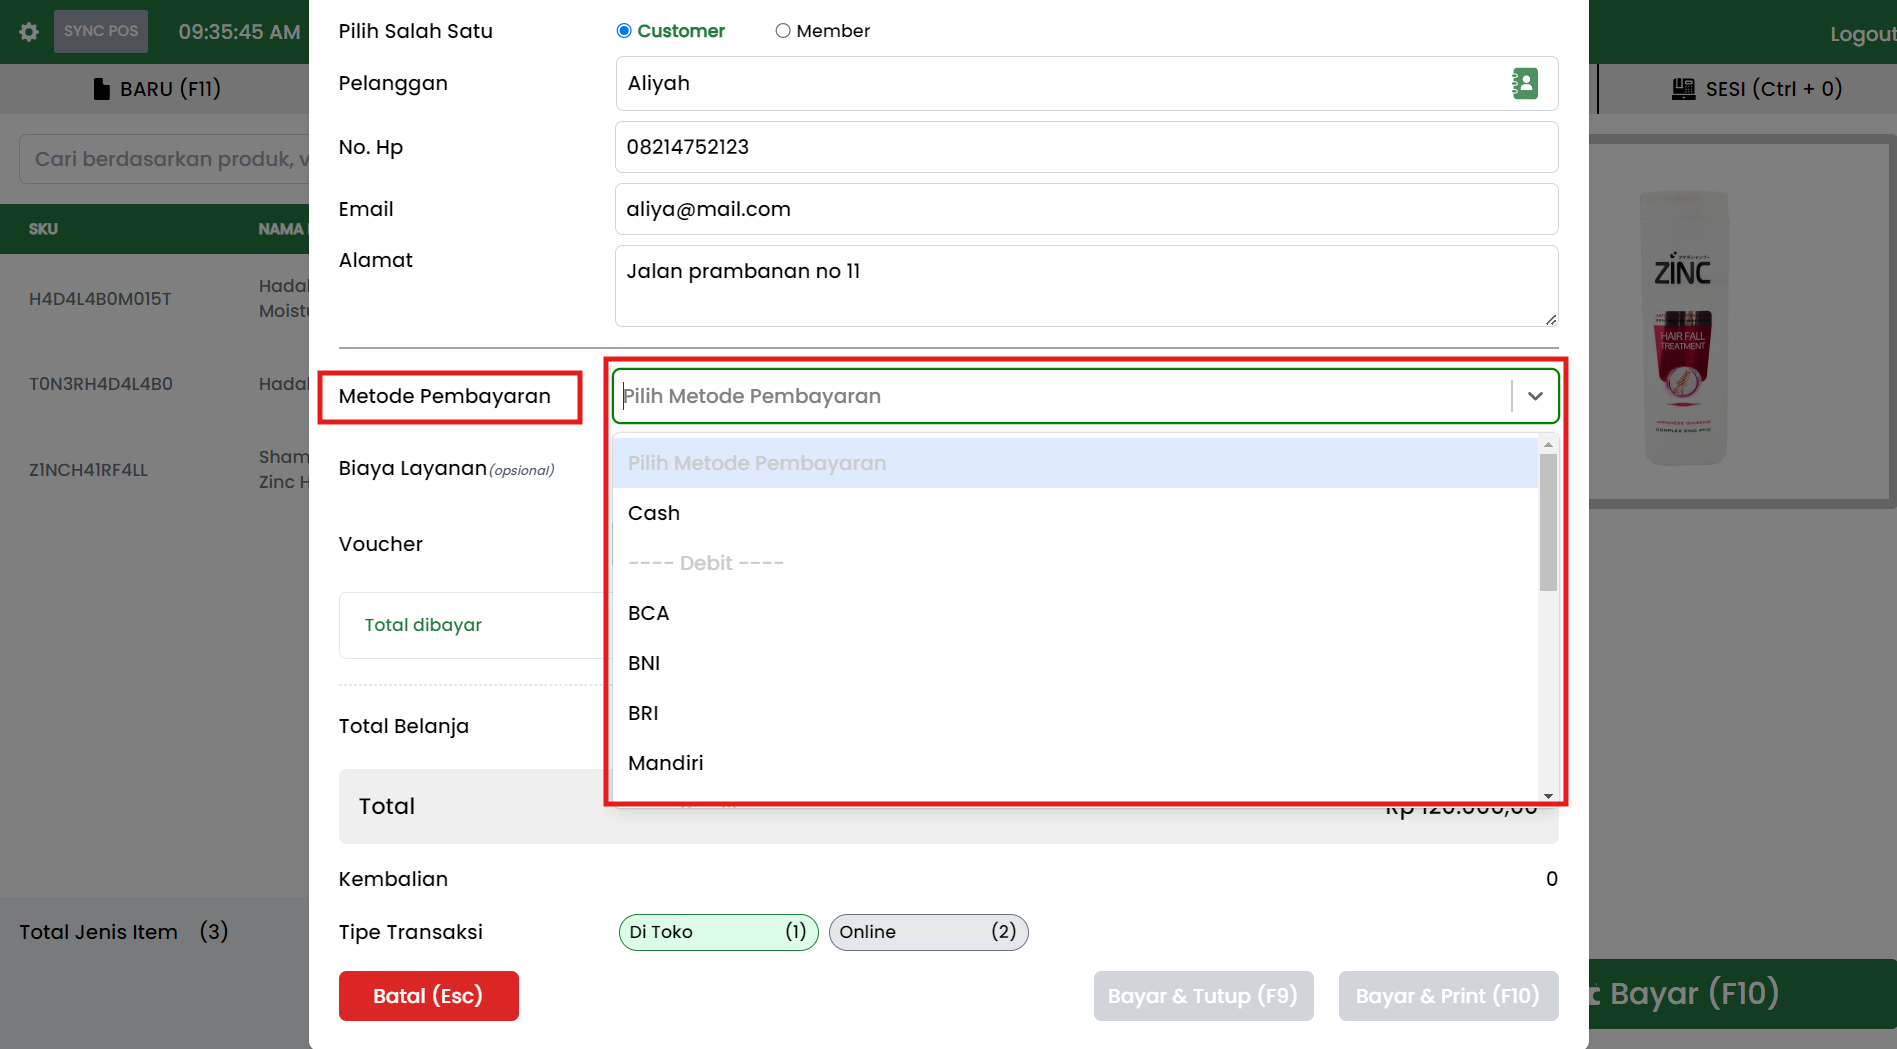
Select the payment method according to the payment received:
- Cash
- Transfer
- QRIS
- E-Wallet
- Other methods
7.5 Service Fee (Optional)
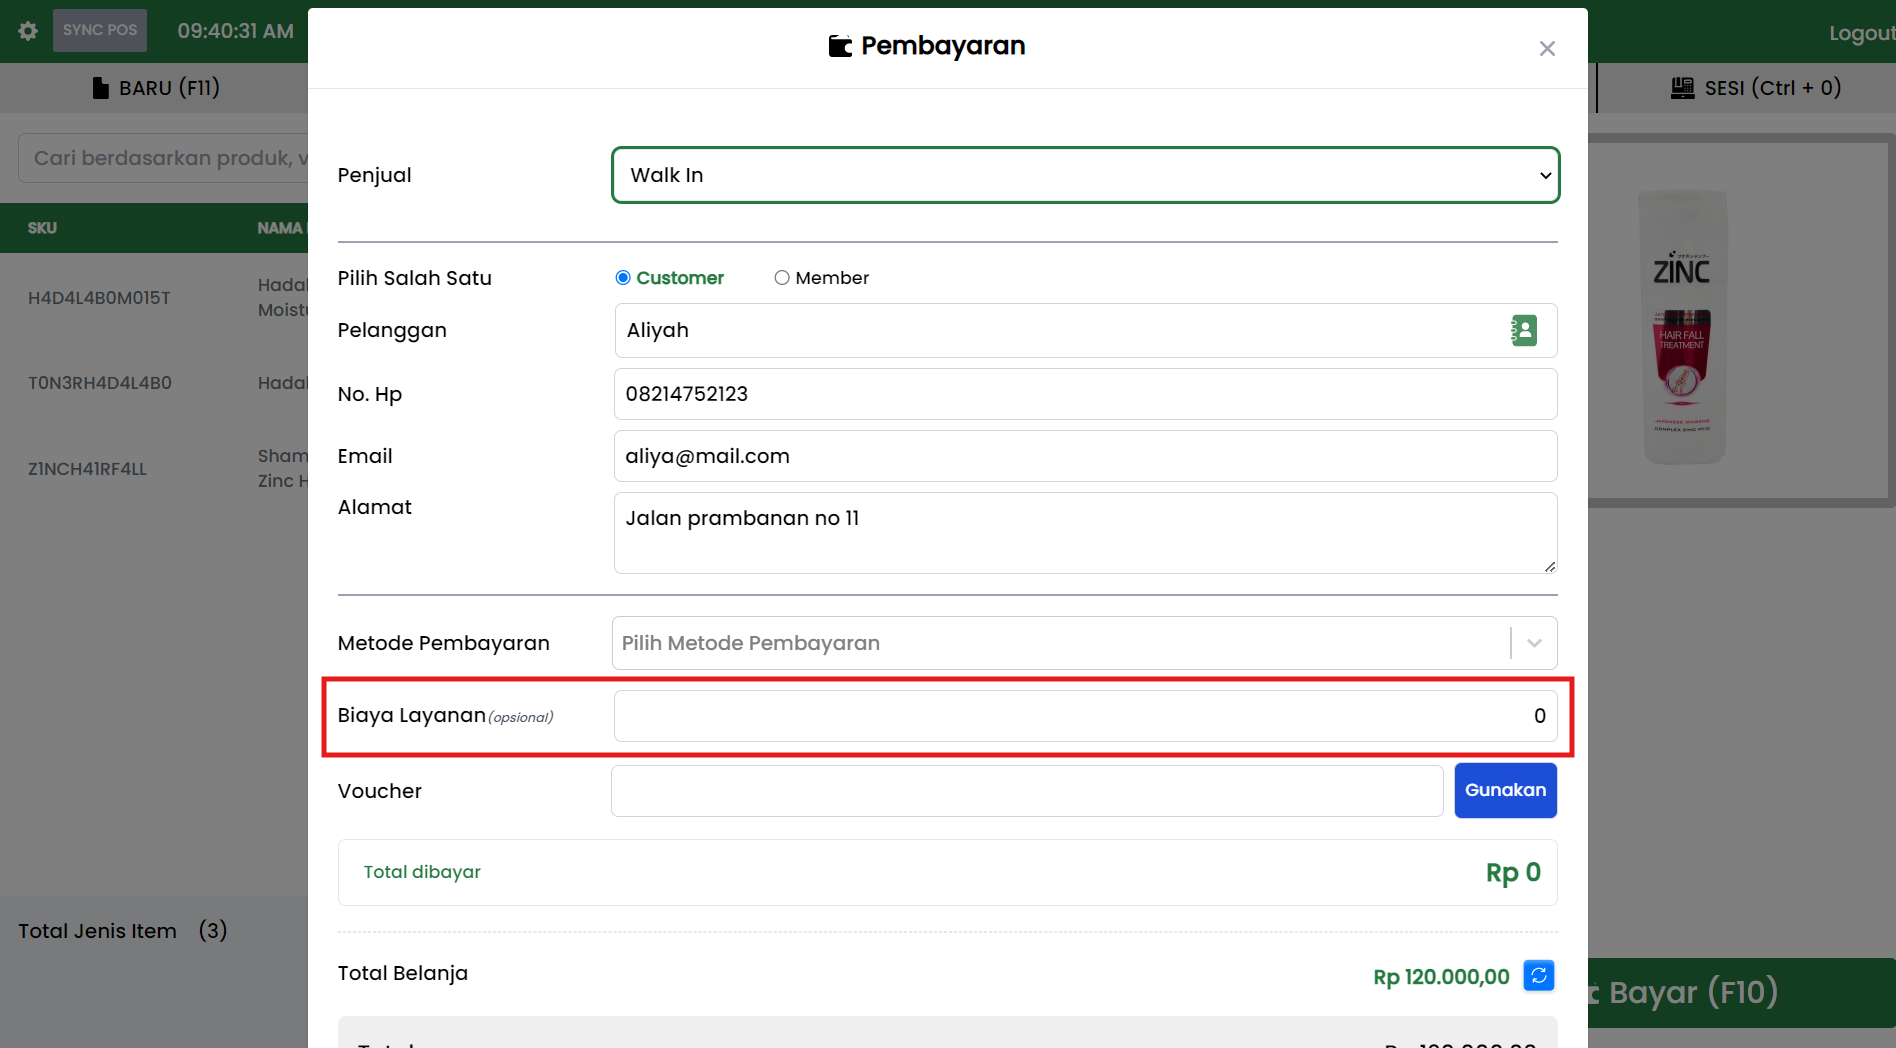
Used if there are additional fees such as admin fee or shipping cost.
If none, enter 0.
7.6 Voucher
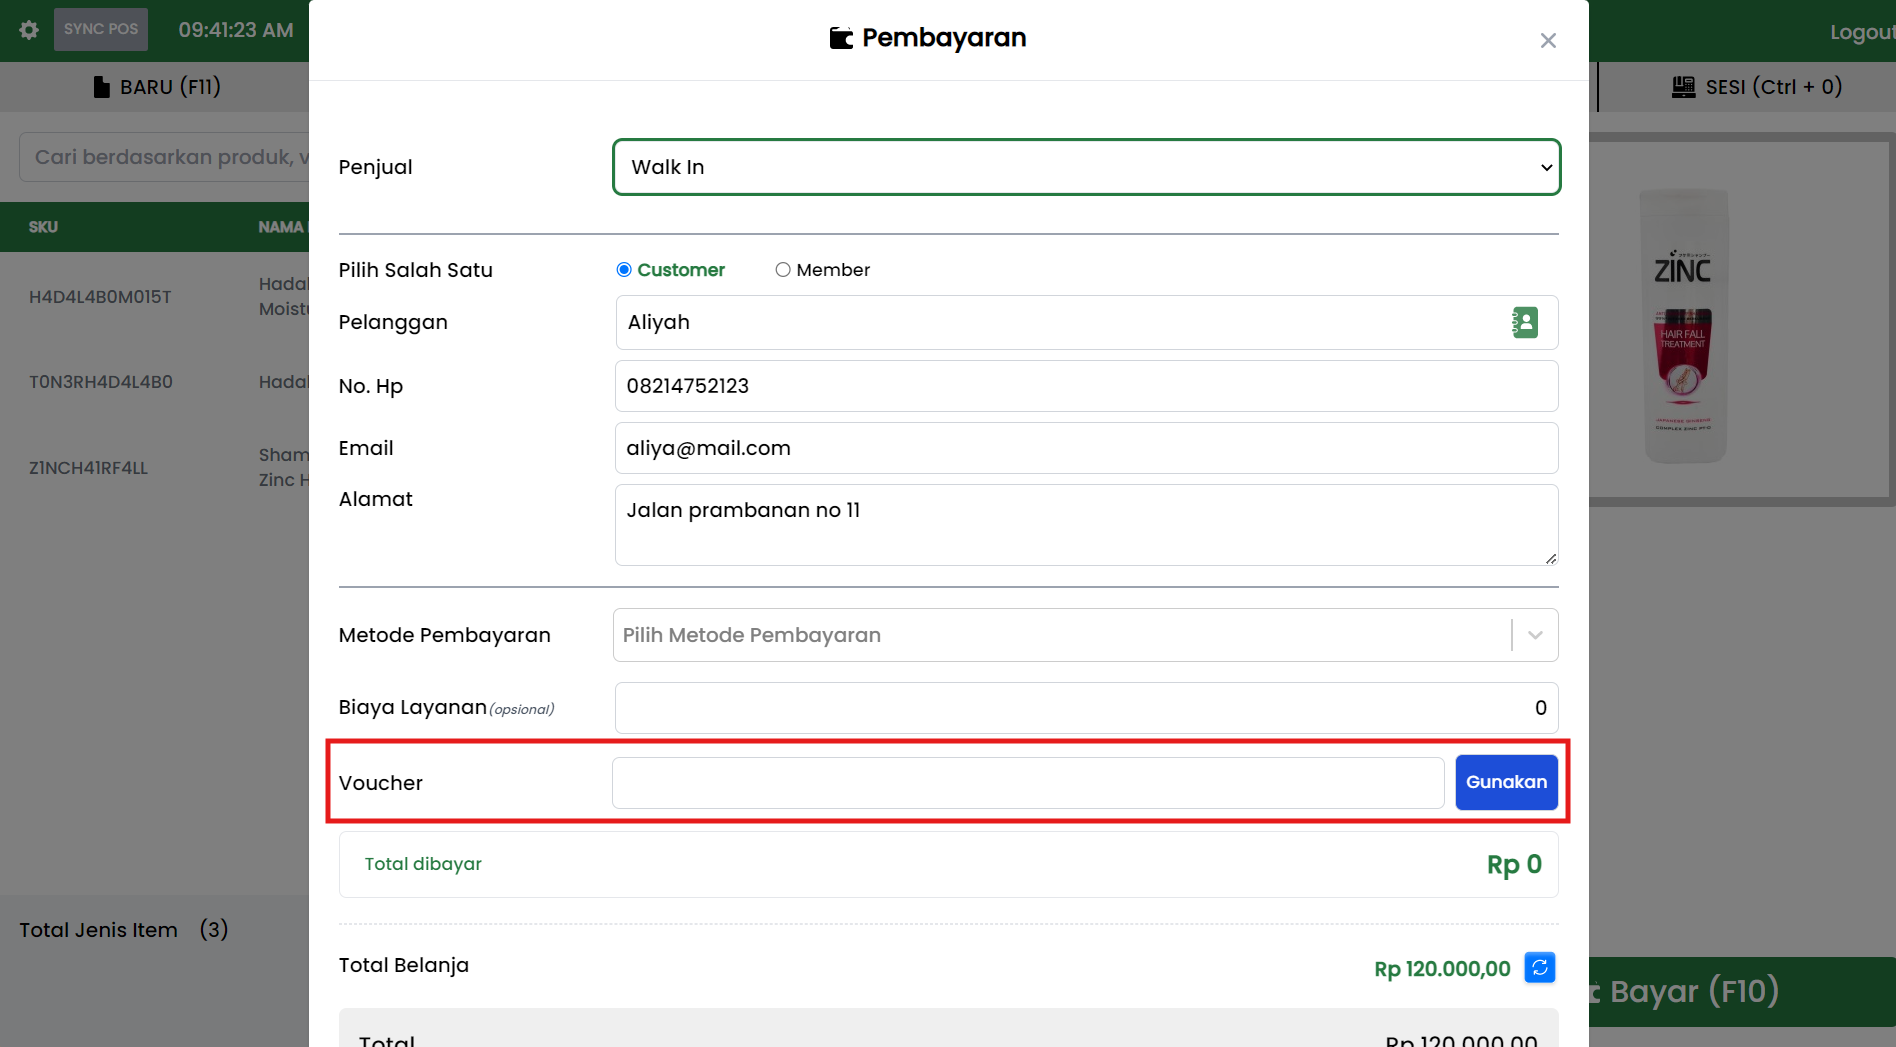
If the customer has a voucher:
- Enter the voucher code.
- Click Apply.
- The system will calculate the discount automatically.
7.7 Payment Summary
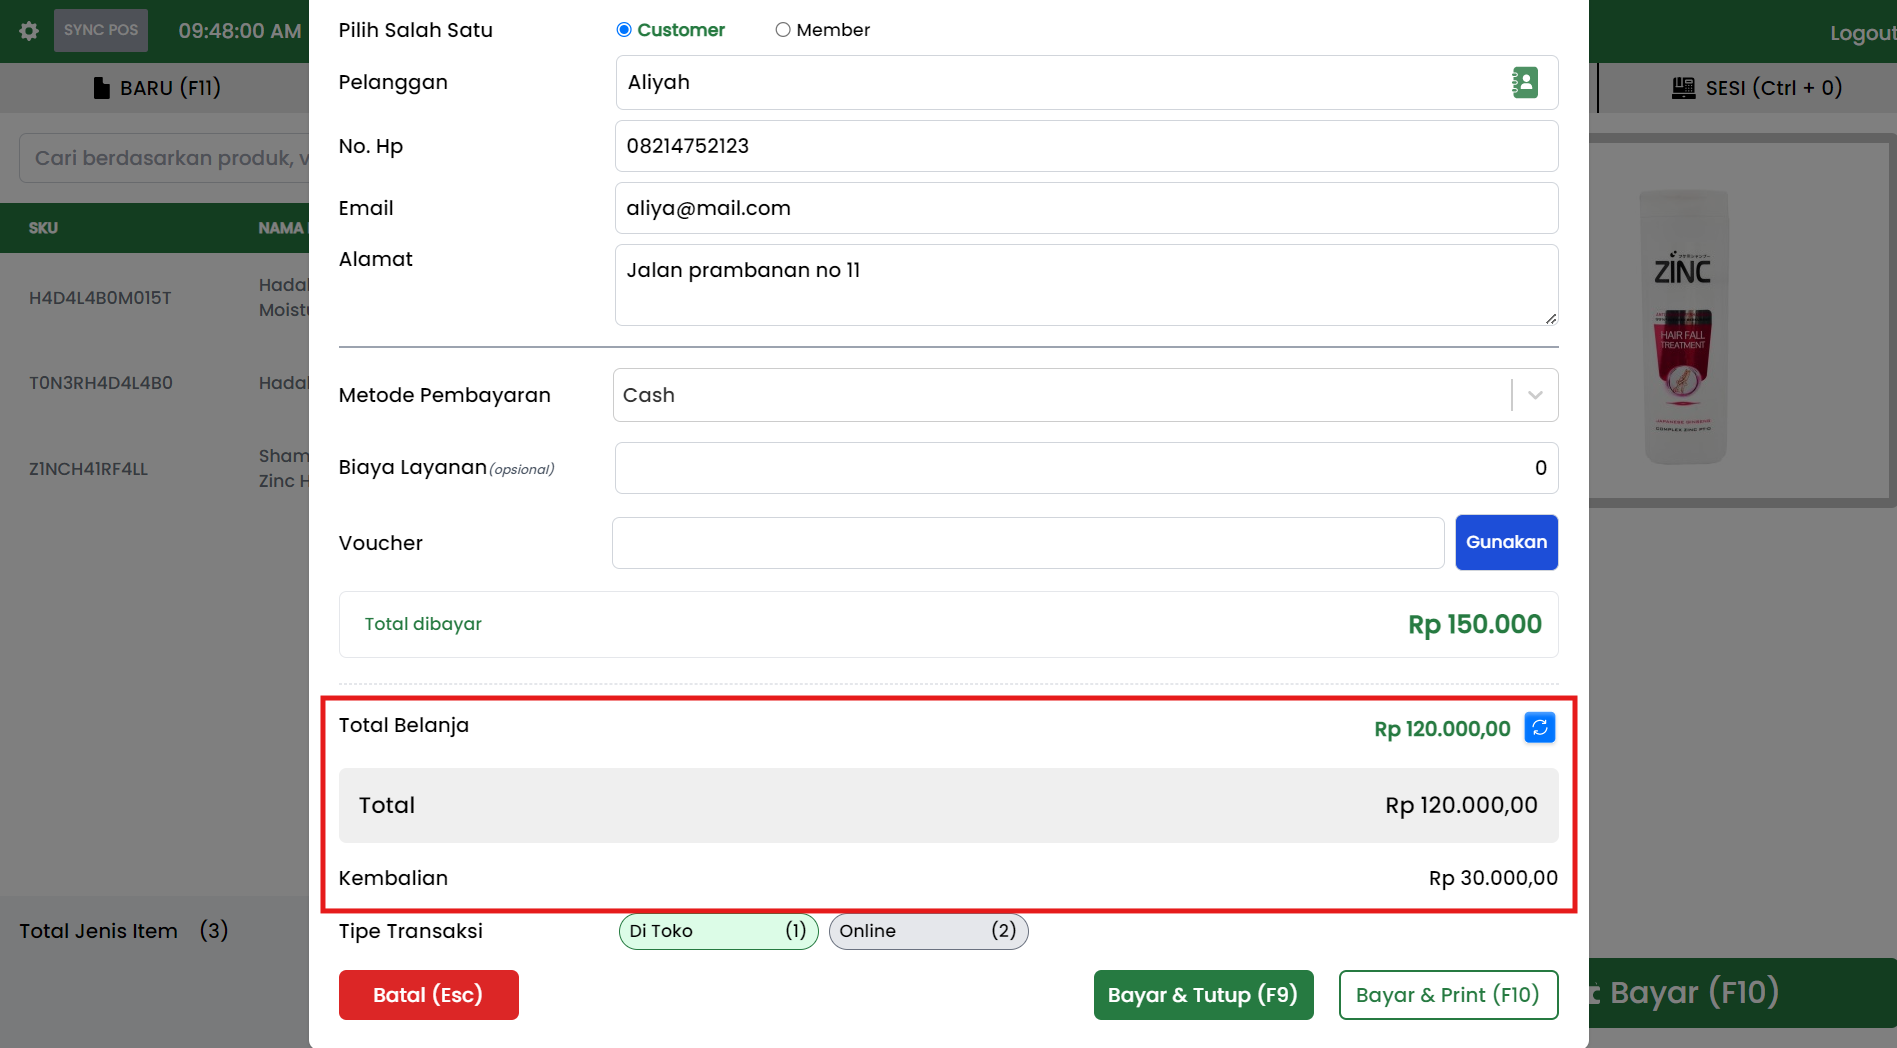
Double-check:
- Total Purchase
- Total
- Total Paid
- Change
Make sure there is no discrepancy before completing the transaction.
7.8 Transaction Type
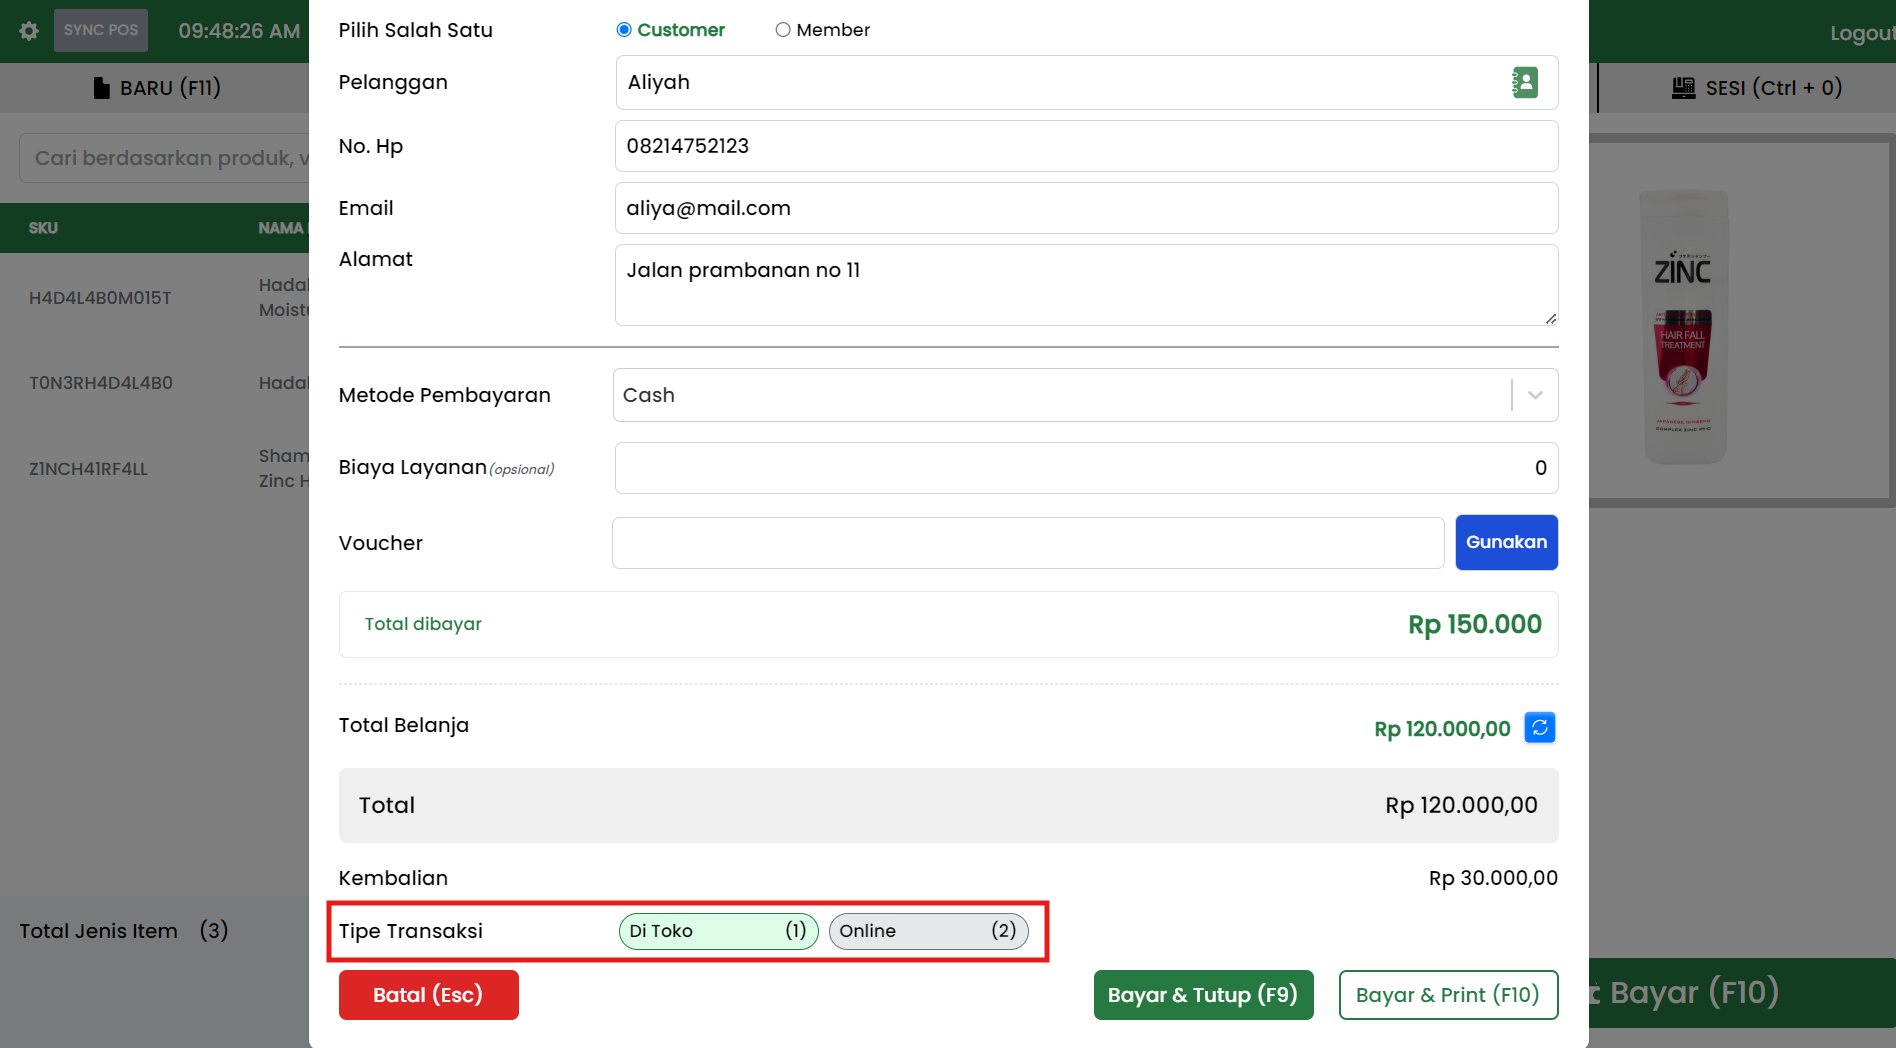
Select the transaction type:
- In Store
- Online
7.9 Completing the Transaction
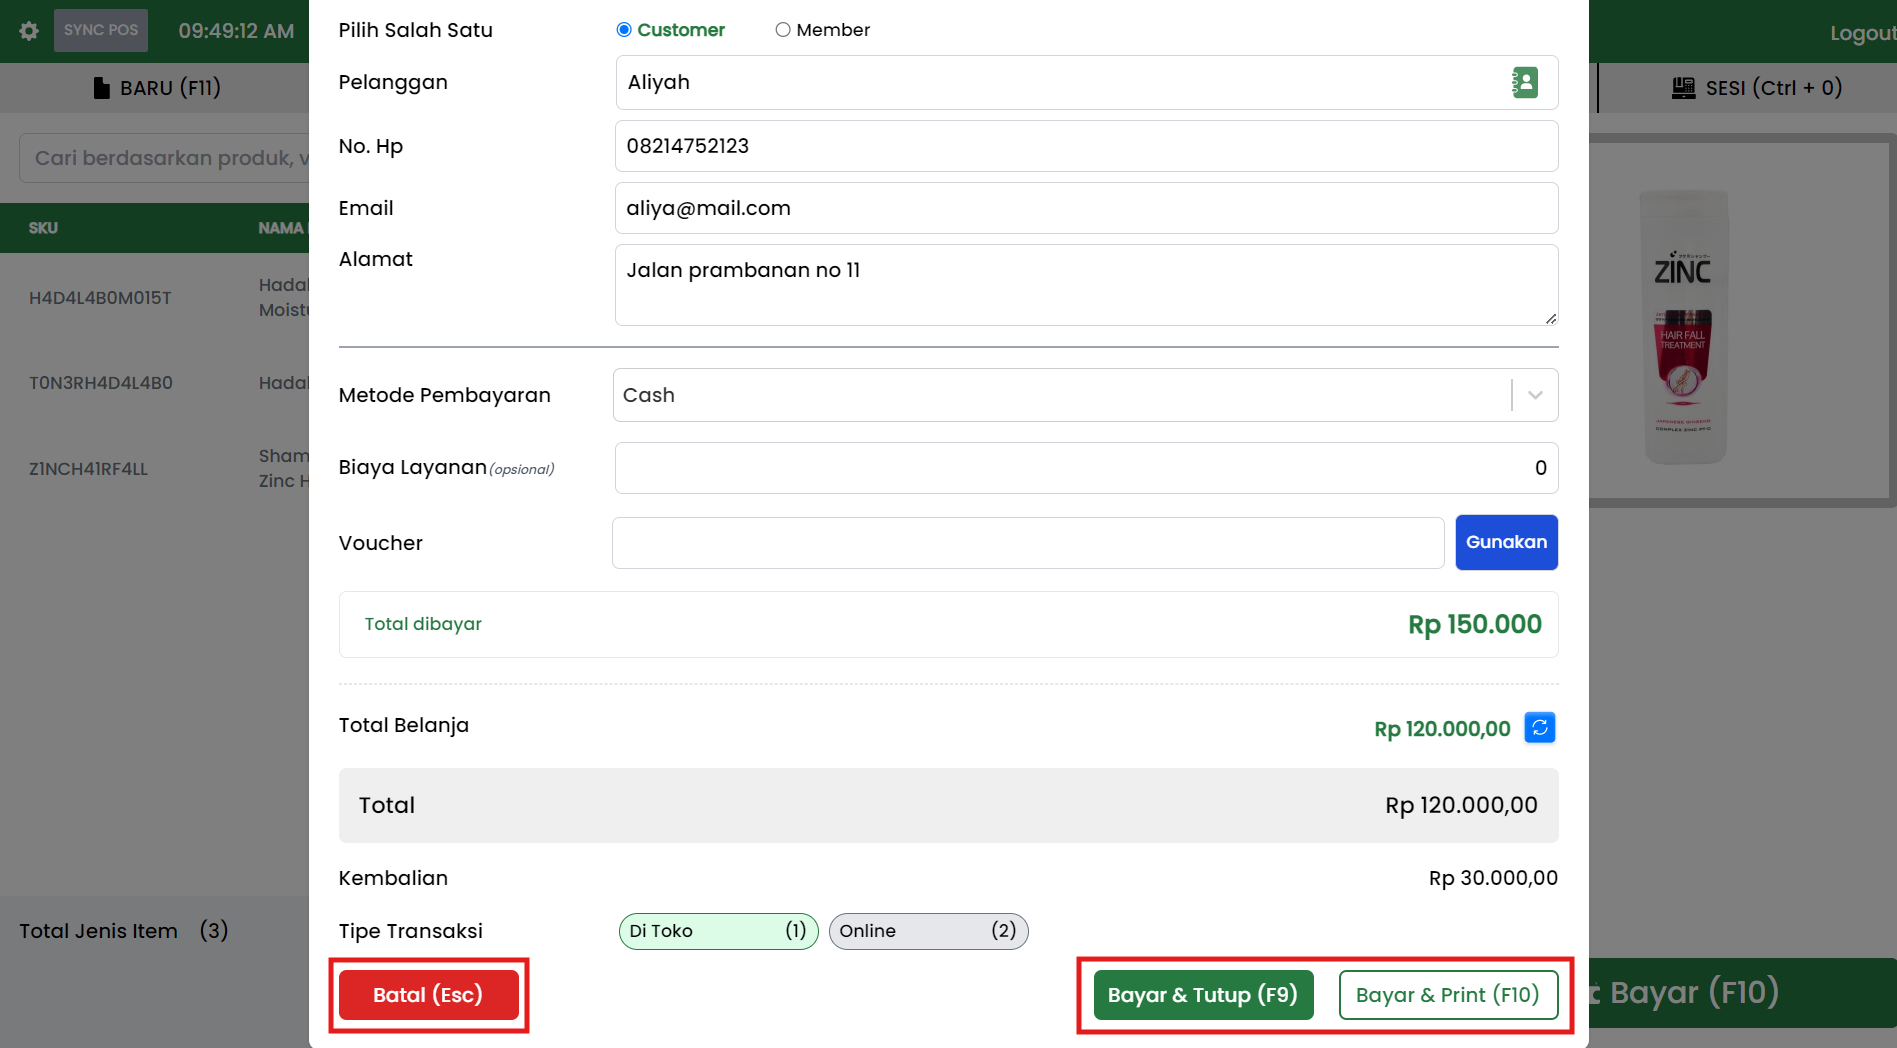
At the bottom of the popup, the following buttons are available:
- Cancel (Esc)
- Pay & Close (F9)
- Pay & Print (F10)
Choose according to your needs. If you want to print the receipt directly, use Pay & Print (F10).
Operational Tips
- Use shortcuts such as F10, F11, F7, and Ctrl+F7 to speed up service.
- Make sure the cashier session is active via SESSION (Ctrl+0).
- Get into the habit of checking the summary before pressing the pay button.
- If the table is empty, start with the product search field.